WooCommerce plugin installation guide
This guide will walk you through installing the Antom Payments plugin for your WooCommerce store.
Supported features
The following table outlines the supported features of WooCommerce, allowing you to quickly access essential information regarding payment methods, transaction currencies, and regional availability, ensuring a smoother and more efficient plugin configuration experience.
Features | |
Merchant entity country/region | Hong Kong (China), Singapore, Australia |
Payment methods & Shopper country/region | |
Features | Payment, Refund, 3DS authentication |
Settlement Currencies (by region) | For Singapore merchants: SGD, USD |
For Hong Kong (China) merchants: HKD, USD | |
For Australia merchants: AUD, USD | |
Install the plugin
Use the WordPress plugin directory to install the the Antom Payments plugin:
- Log in to WordPress as an administrator.
- In the left menu, go to Plugins > Add New.
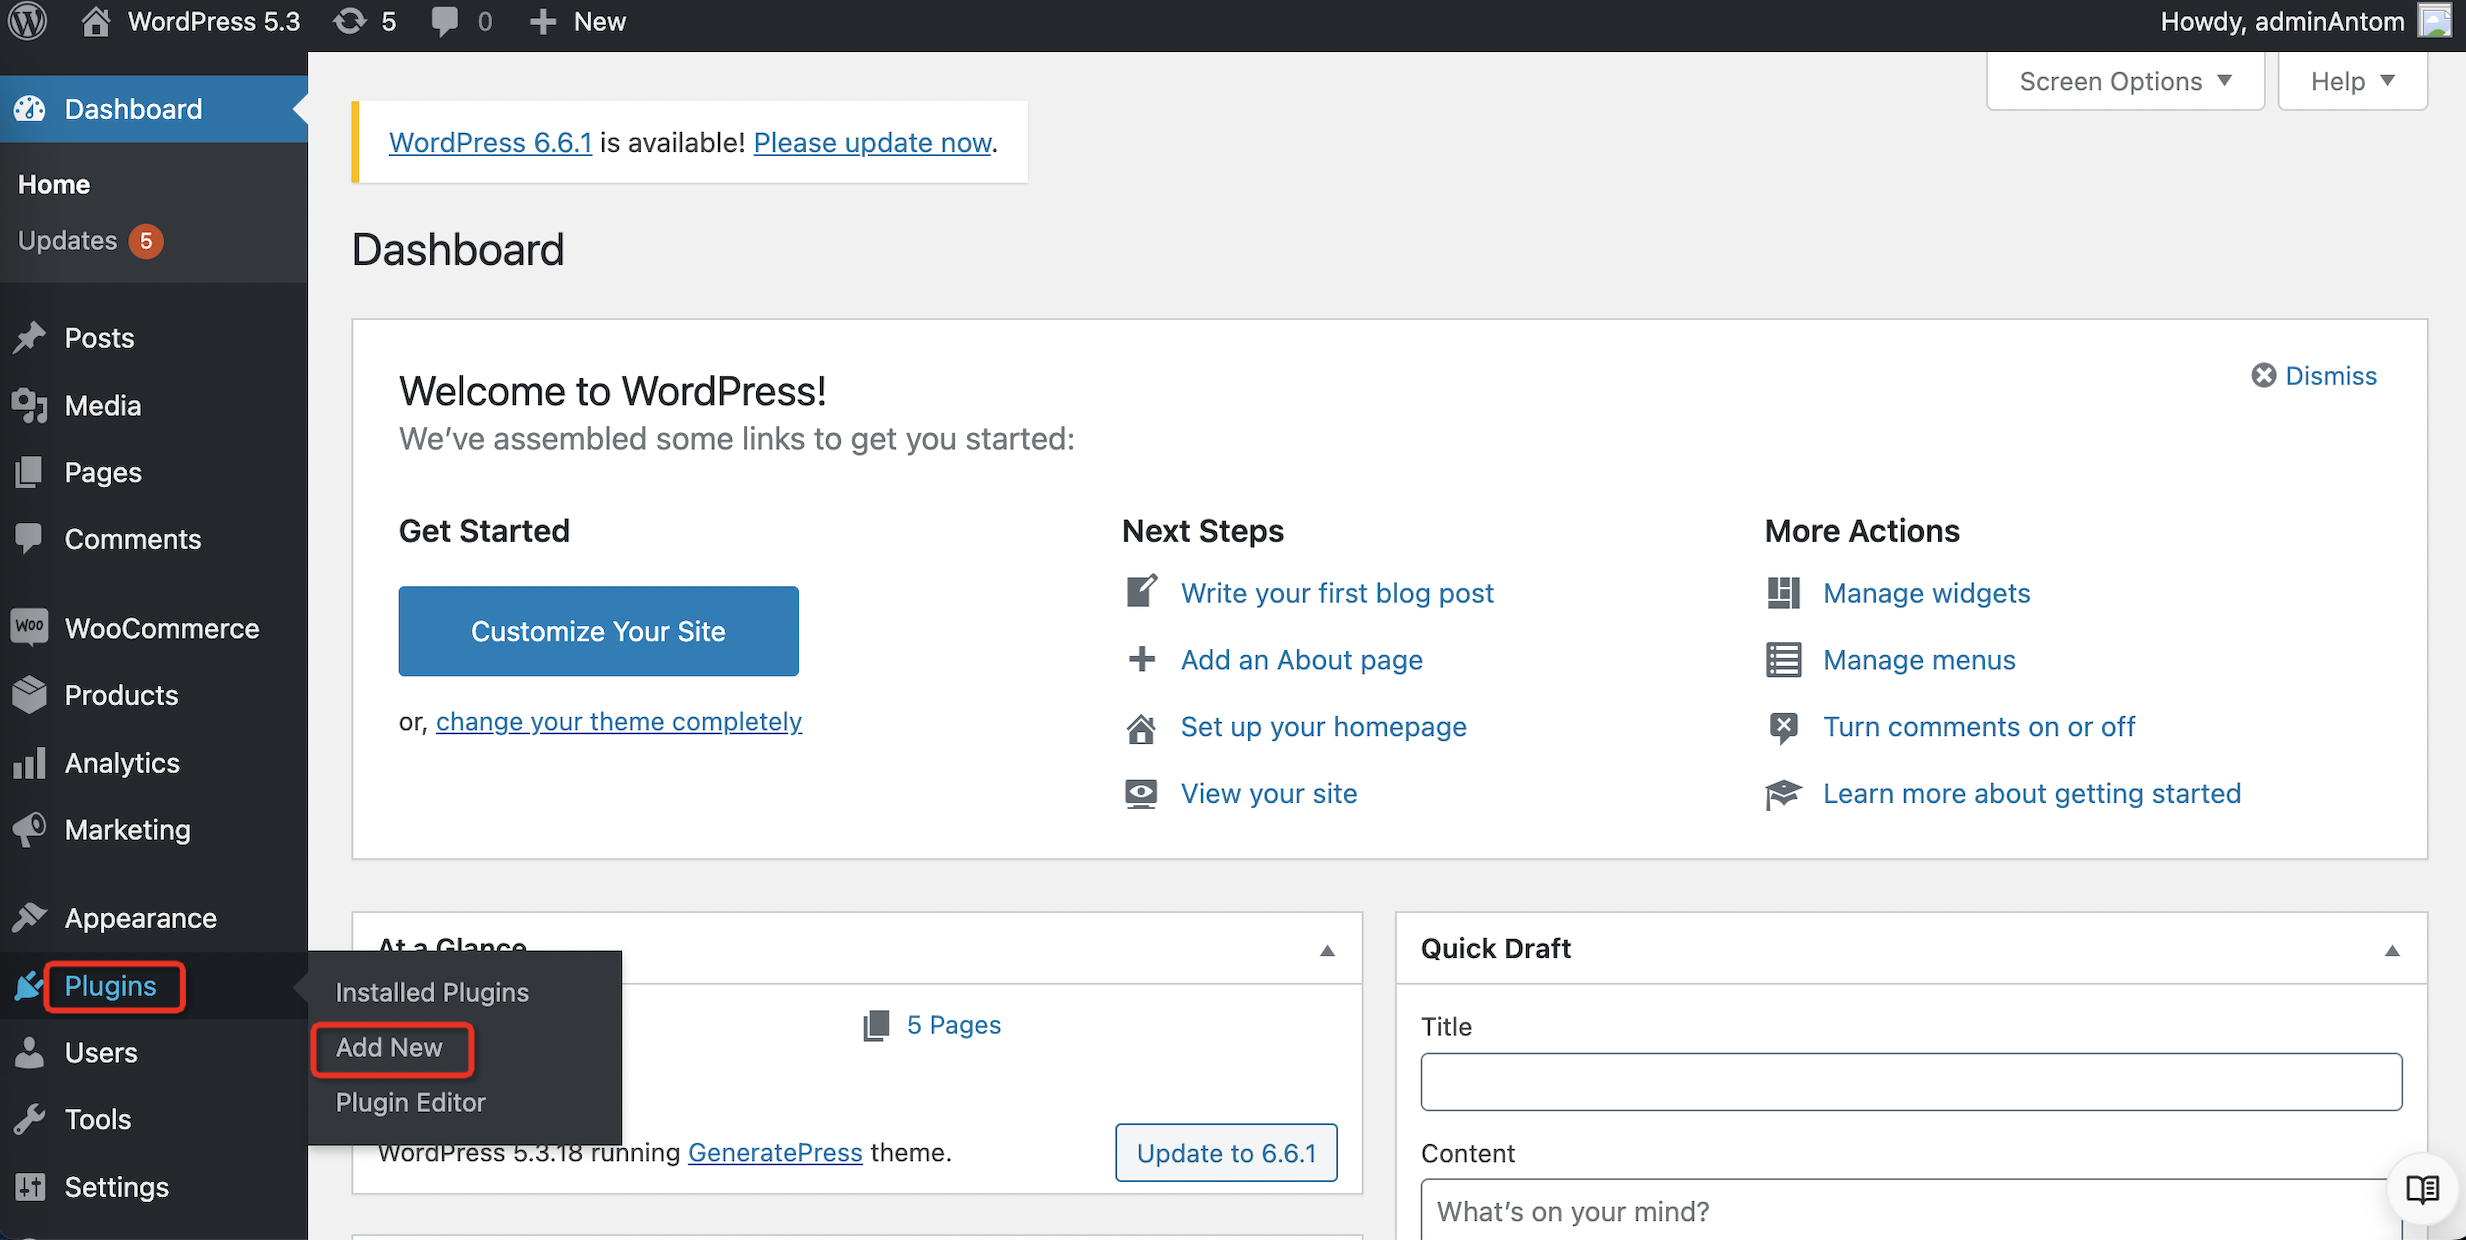
- Search for Antom Payments in the search bar on the right.
- Click Install Now.
- Click Activate.
Create an Antom account
Follow the steps below to register your Antom account for WooCommerce business.
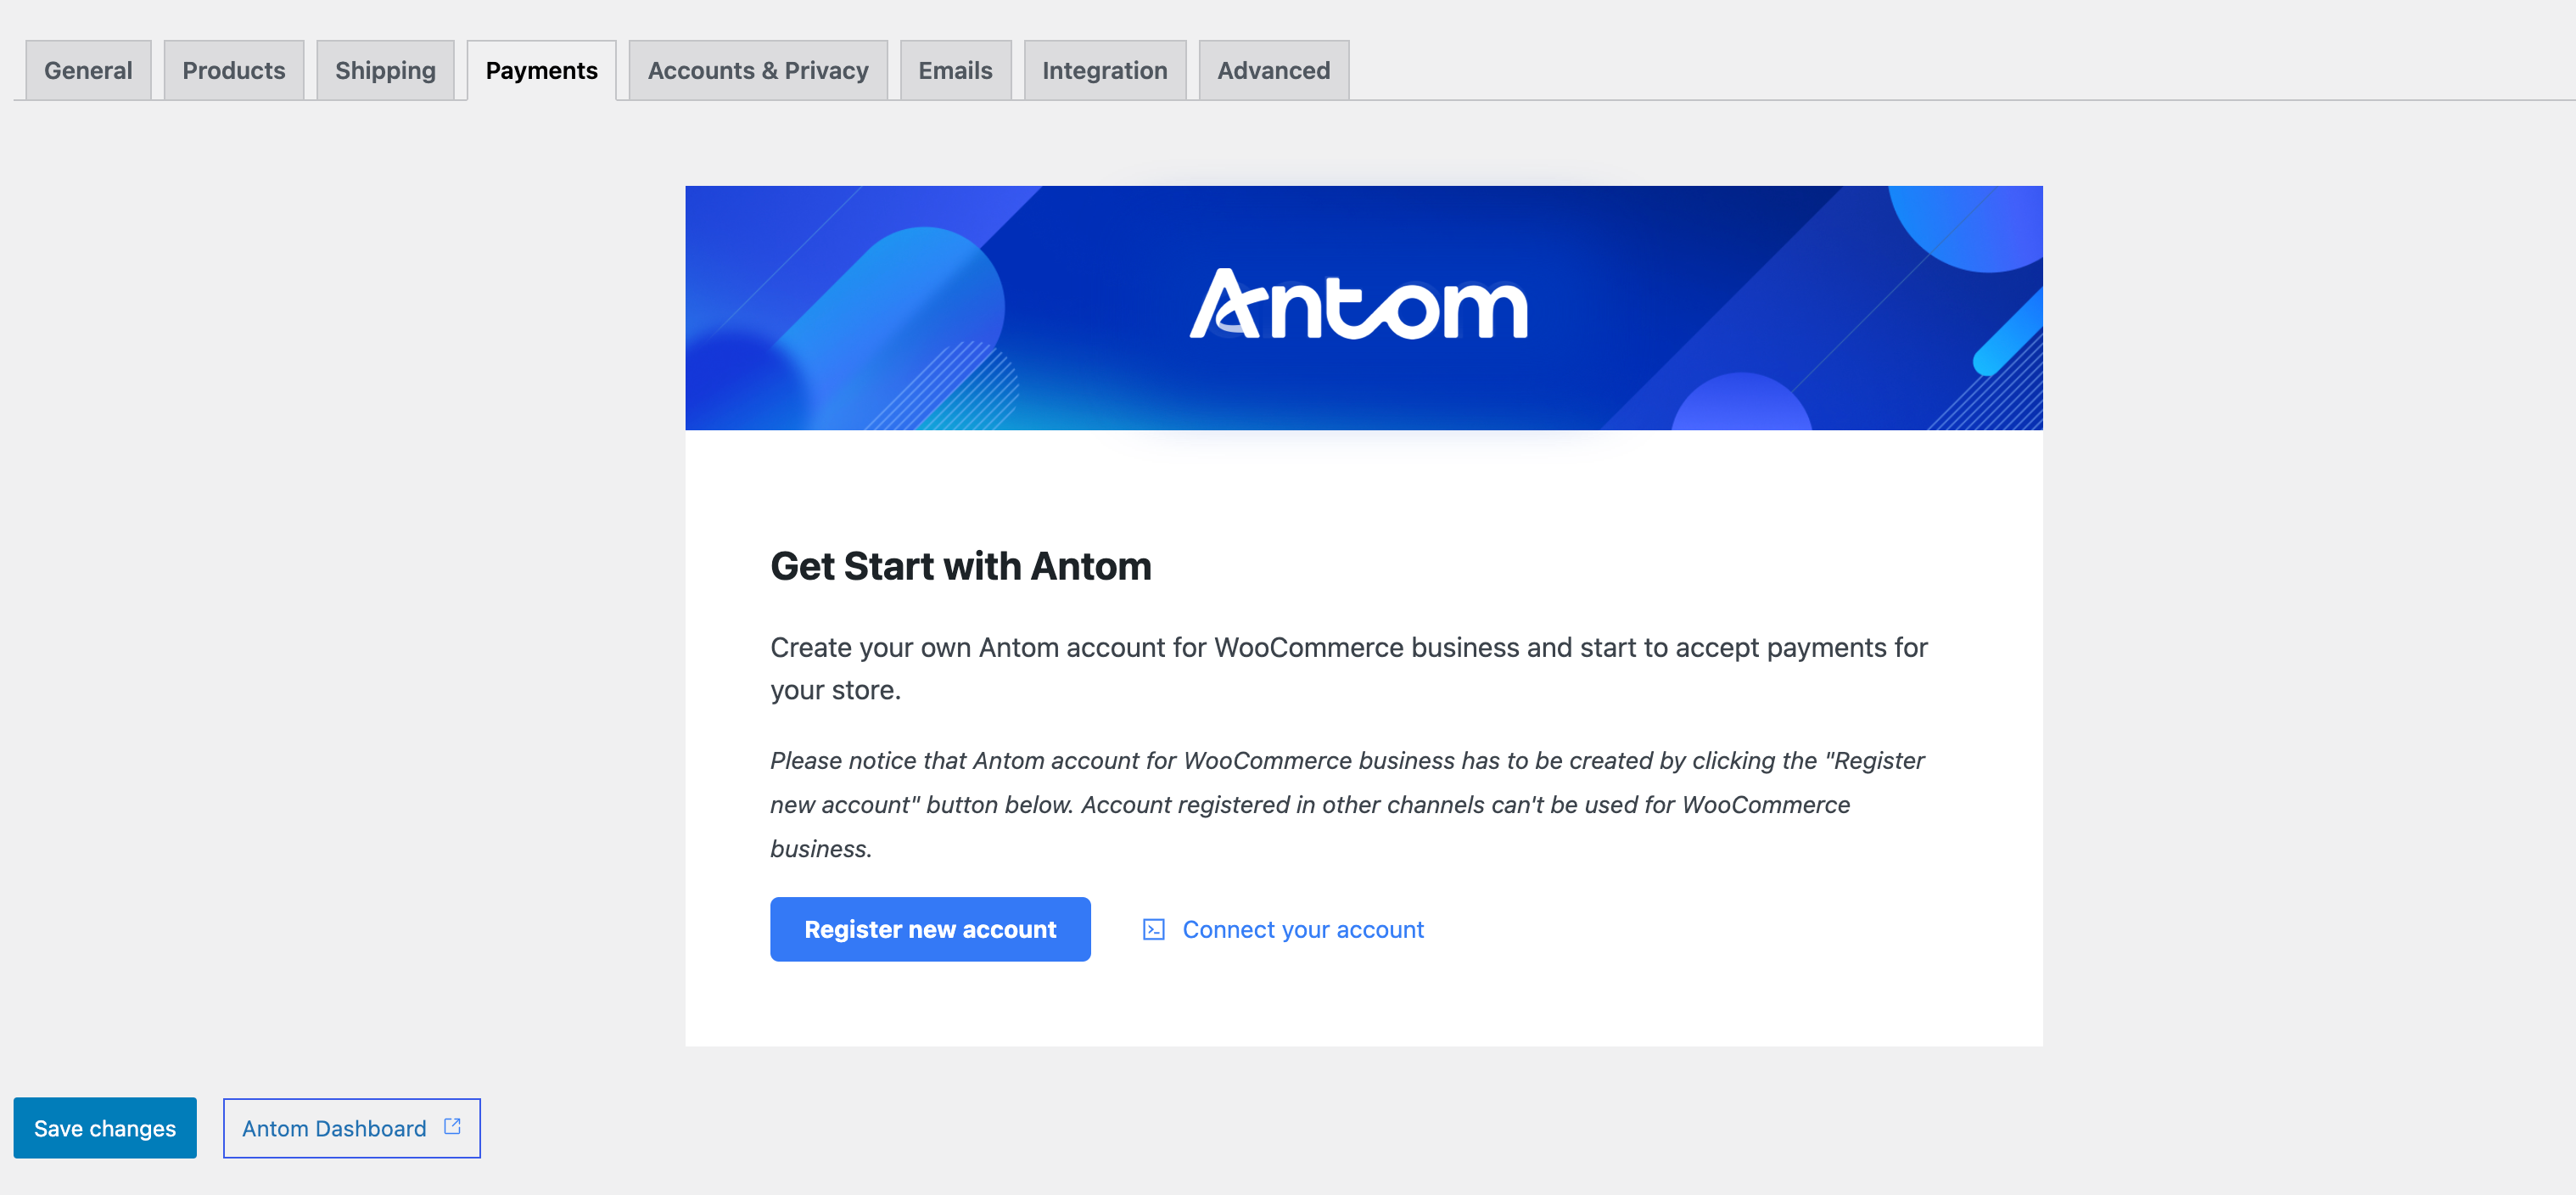
Note: Antom account for WooCommerce business has to be created by clicking the Register new account button. Account registered in other channels cannot be used for WooCommerce business.
Step 1: Register an account
After installing and activating the plugin, click Register new account on the Payments page of the plugin to register an account, or click on this registration link to register directly.
Step 2: Activate your account
After registering your account, you need to activate it to obtain the required configuration information. Refer to the Activate your account section for detailed process.
Note: Activation approval generally takes 1-2 days to complete. Antom Dashboard cannot be switched to live mode until your account is activated. Before that, you can test your plugin in the sandbox, refer to Test the plugin in the sandbox for the detailed process.
Configure the plugin
- Once your Antom account is activated, click Connect your account to enter the plugin's configuration page for the first time.
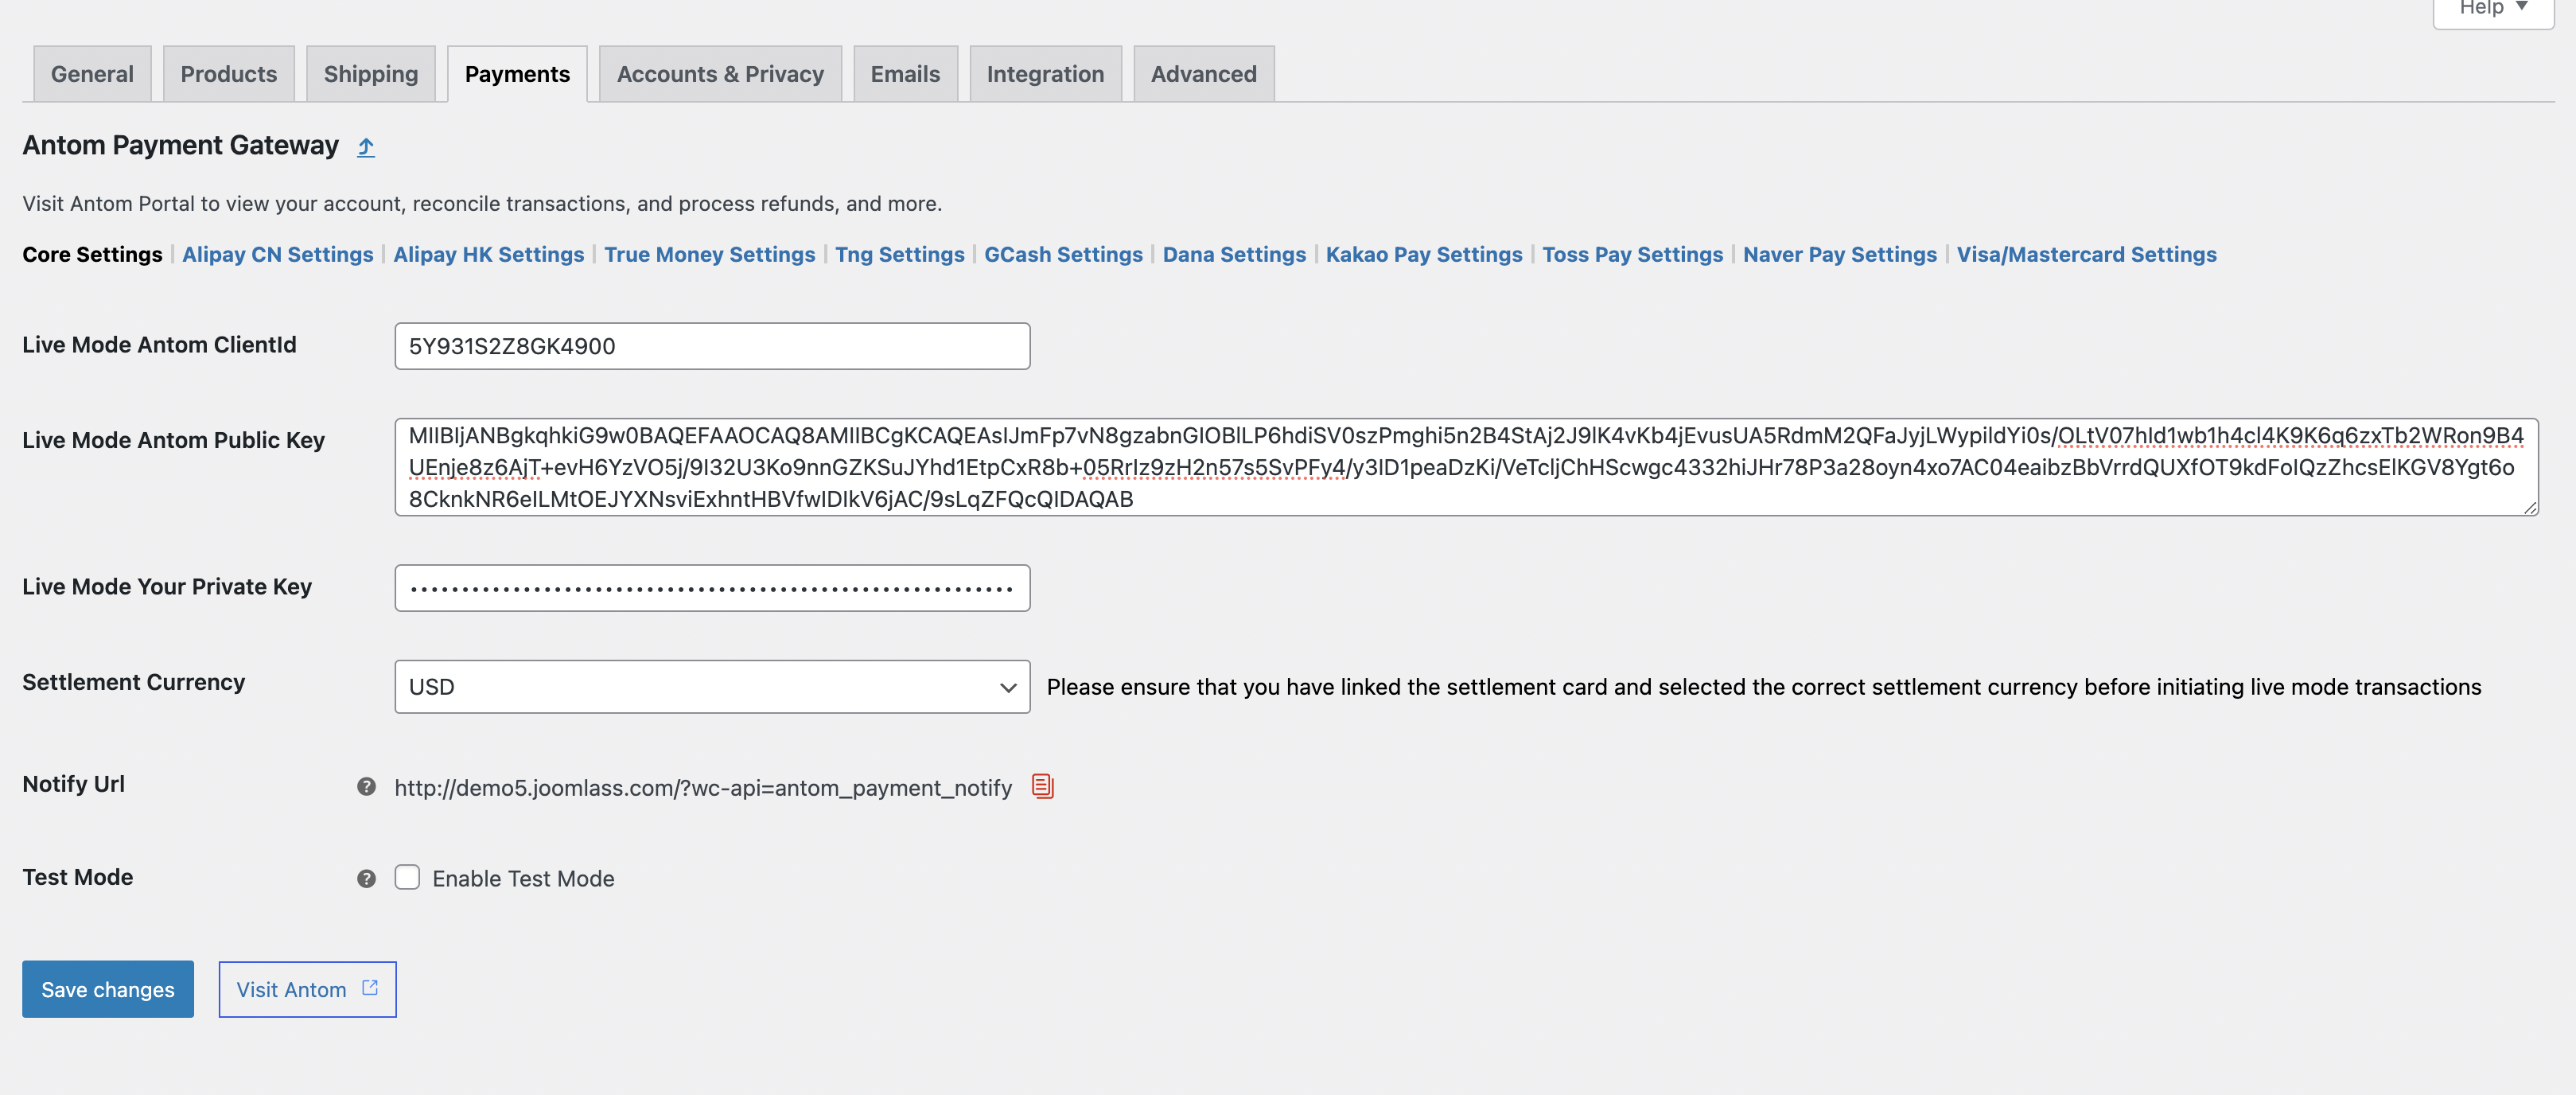
- Click Visit Antom and switch your account to live mode to obtain the following configuration information:
- Live Mode Antom ClientId: The unique ID assigned to your account in live mode.
- Live Mode Antom Public Key: The public key provided to you in live mode.
- Live Mode Your Private Key: The key used for authentication that matches the public key you configured on Antom Dashboard.
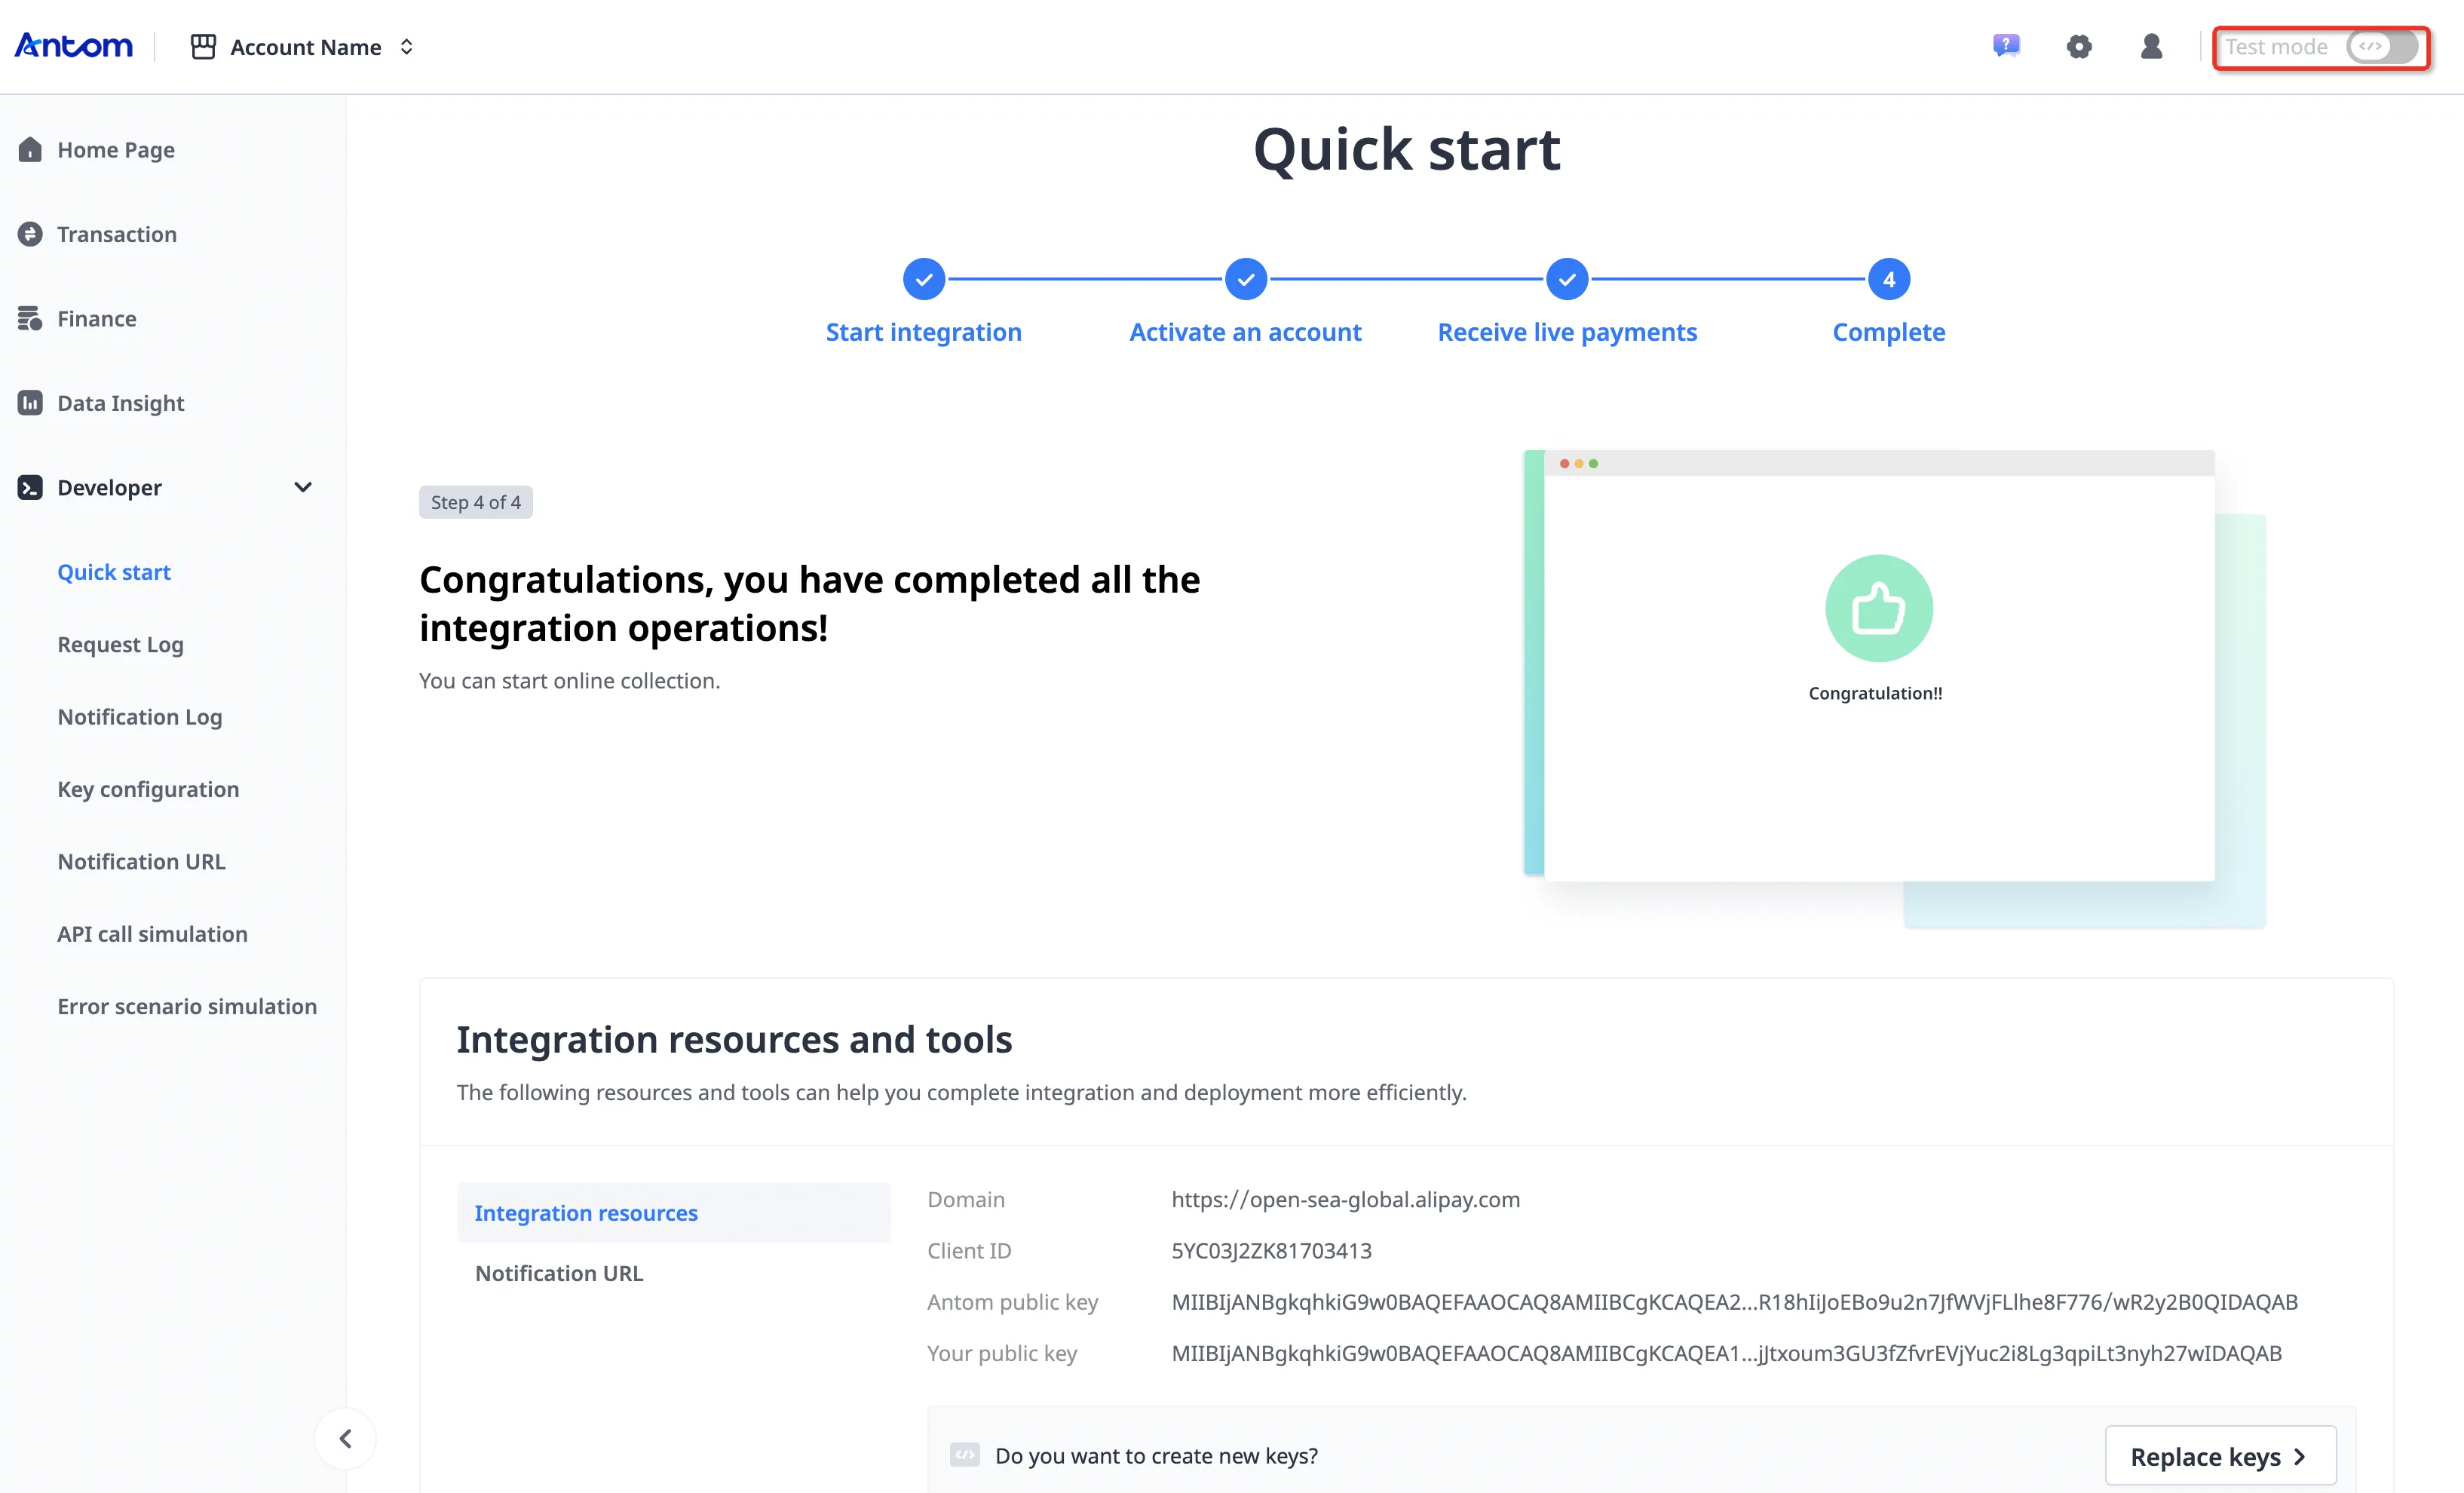
Refer to Antom Dashboard for the detailed process.
- View the bound settlement card and settlement currency on the Settlement overview page.
Before initiating a transaction in live mode, ensure that you have completed the settlement card binding in Antom Dashboard and specified the corresponding currency on the plugin configuration page.
Note: All the above operations need to be carried out in live mode.
Configure the notification URL
After setting up the plugin configuration information, you need to configure the notification URL in live mode to receive payment notifications as following steps.
- Obtain the notification URL in the Notify Url option of the Antom Payments plugin.
- Set alipay.ams.payments.payNotify and alipay.ams.payments.captureNotify on Notification URL page in live mode.
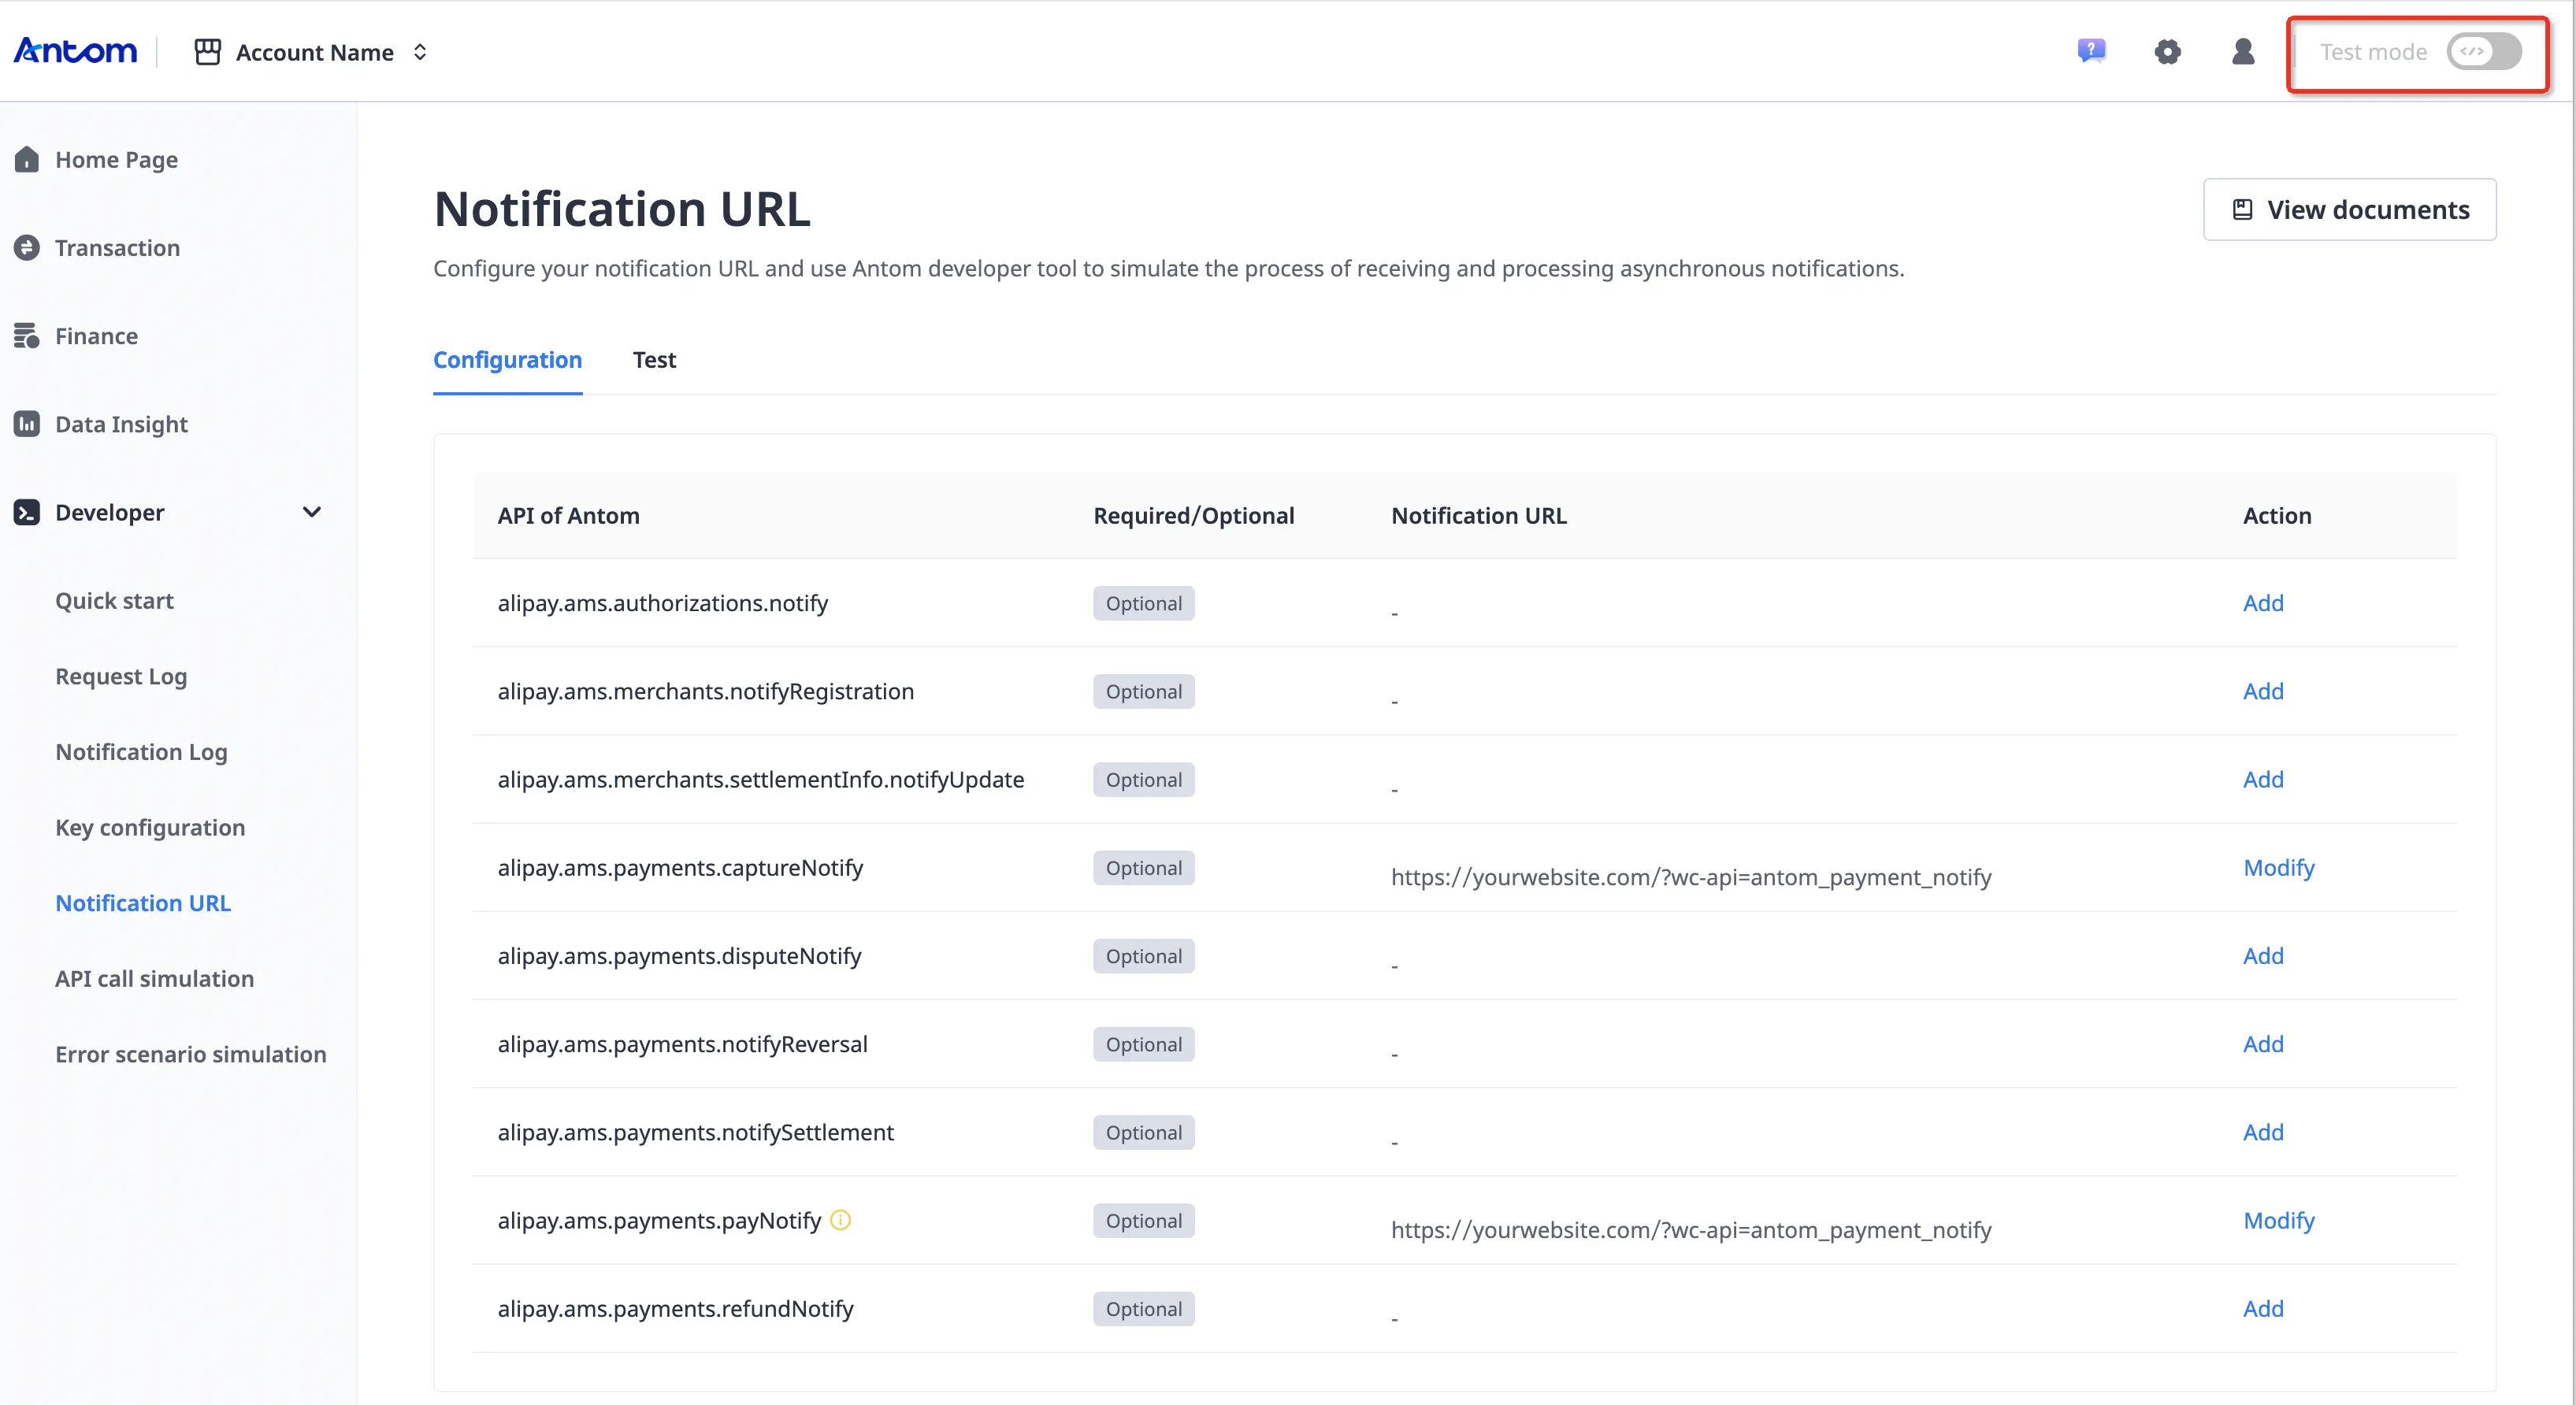
Note: All the above operations need to be carried out in live mode.
Go live
After completing the above configuration and checking the following items,you can use the plugin to initiate real transactions.
- ✅Ensure you have completed a payment in sandbox and the order status has been successfully updated.
- ✅Ensure the Enable Test option is unenabled on the plugin setting page.
- ✅Ensure the payment method has been activated on Antom Dashboard Payment methods page.
- ✅Ensure the notification address has been configured on Antom Dashboard Notification URL page.
Test notification URL in live
In order to test whether you can receive the notification correctly in the live mode, you can initiate a payment request (such as ALIPAY_HK). If you do not have an ALIPAY_HK wallet to pay, you can wait until the payment expires (The default is 15 minutes; when you set the inventory expiration time, the payment expiration time is equal to your inventory expiration time). At this time, Antom will send a notification to your WordPress, setting the order status to FAIL.
- If your notification configuration is correct, the order status will be set to FAIL after the deadline.
- If the order status remains pending payment, it indicates that your notification may not be configured correctly. You need to check whether the notification URL, public/private key, and clientId on the plugin configuration page are consistent with those on the Antom Dashboard.
Test the plugin in sandbox
Before you officially open the plugin to users, we recommend testing the plugin in sandbox mode, according to the following steps:
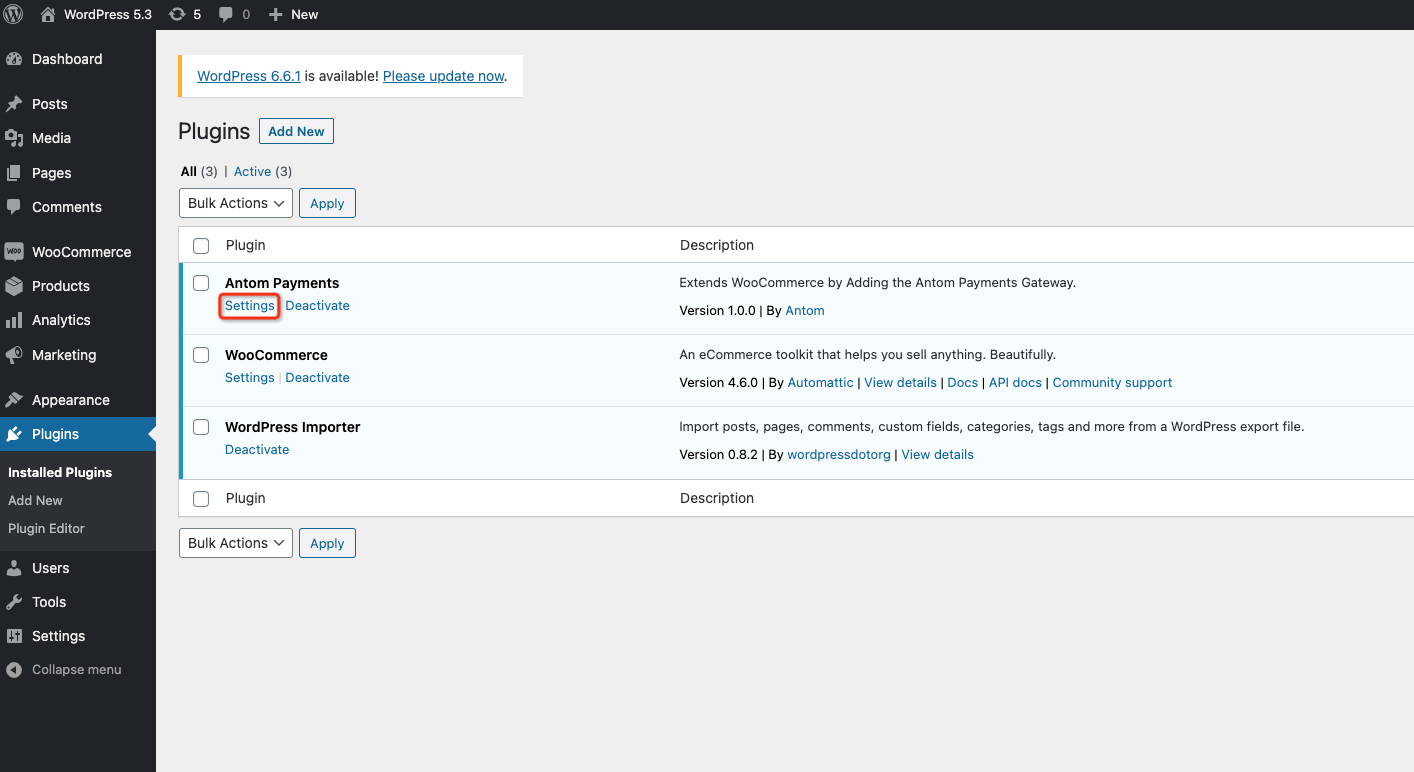
- Click Connect your account or Settings to access the plugin configuration page.
- Check the Enable Test Mode box.
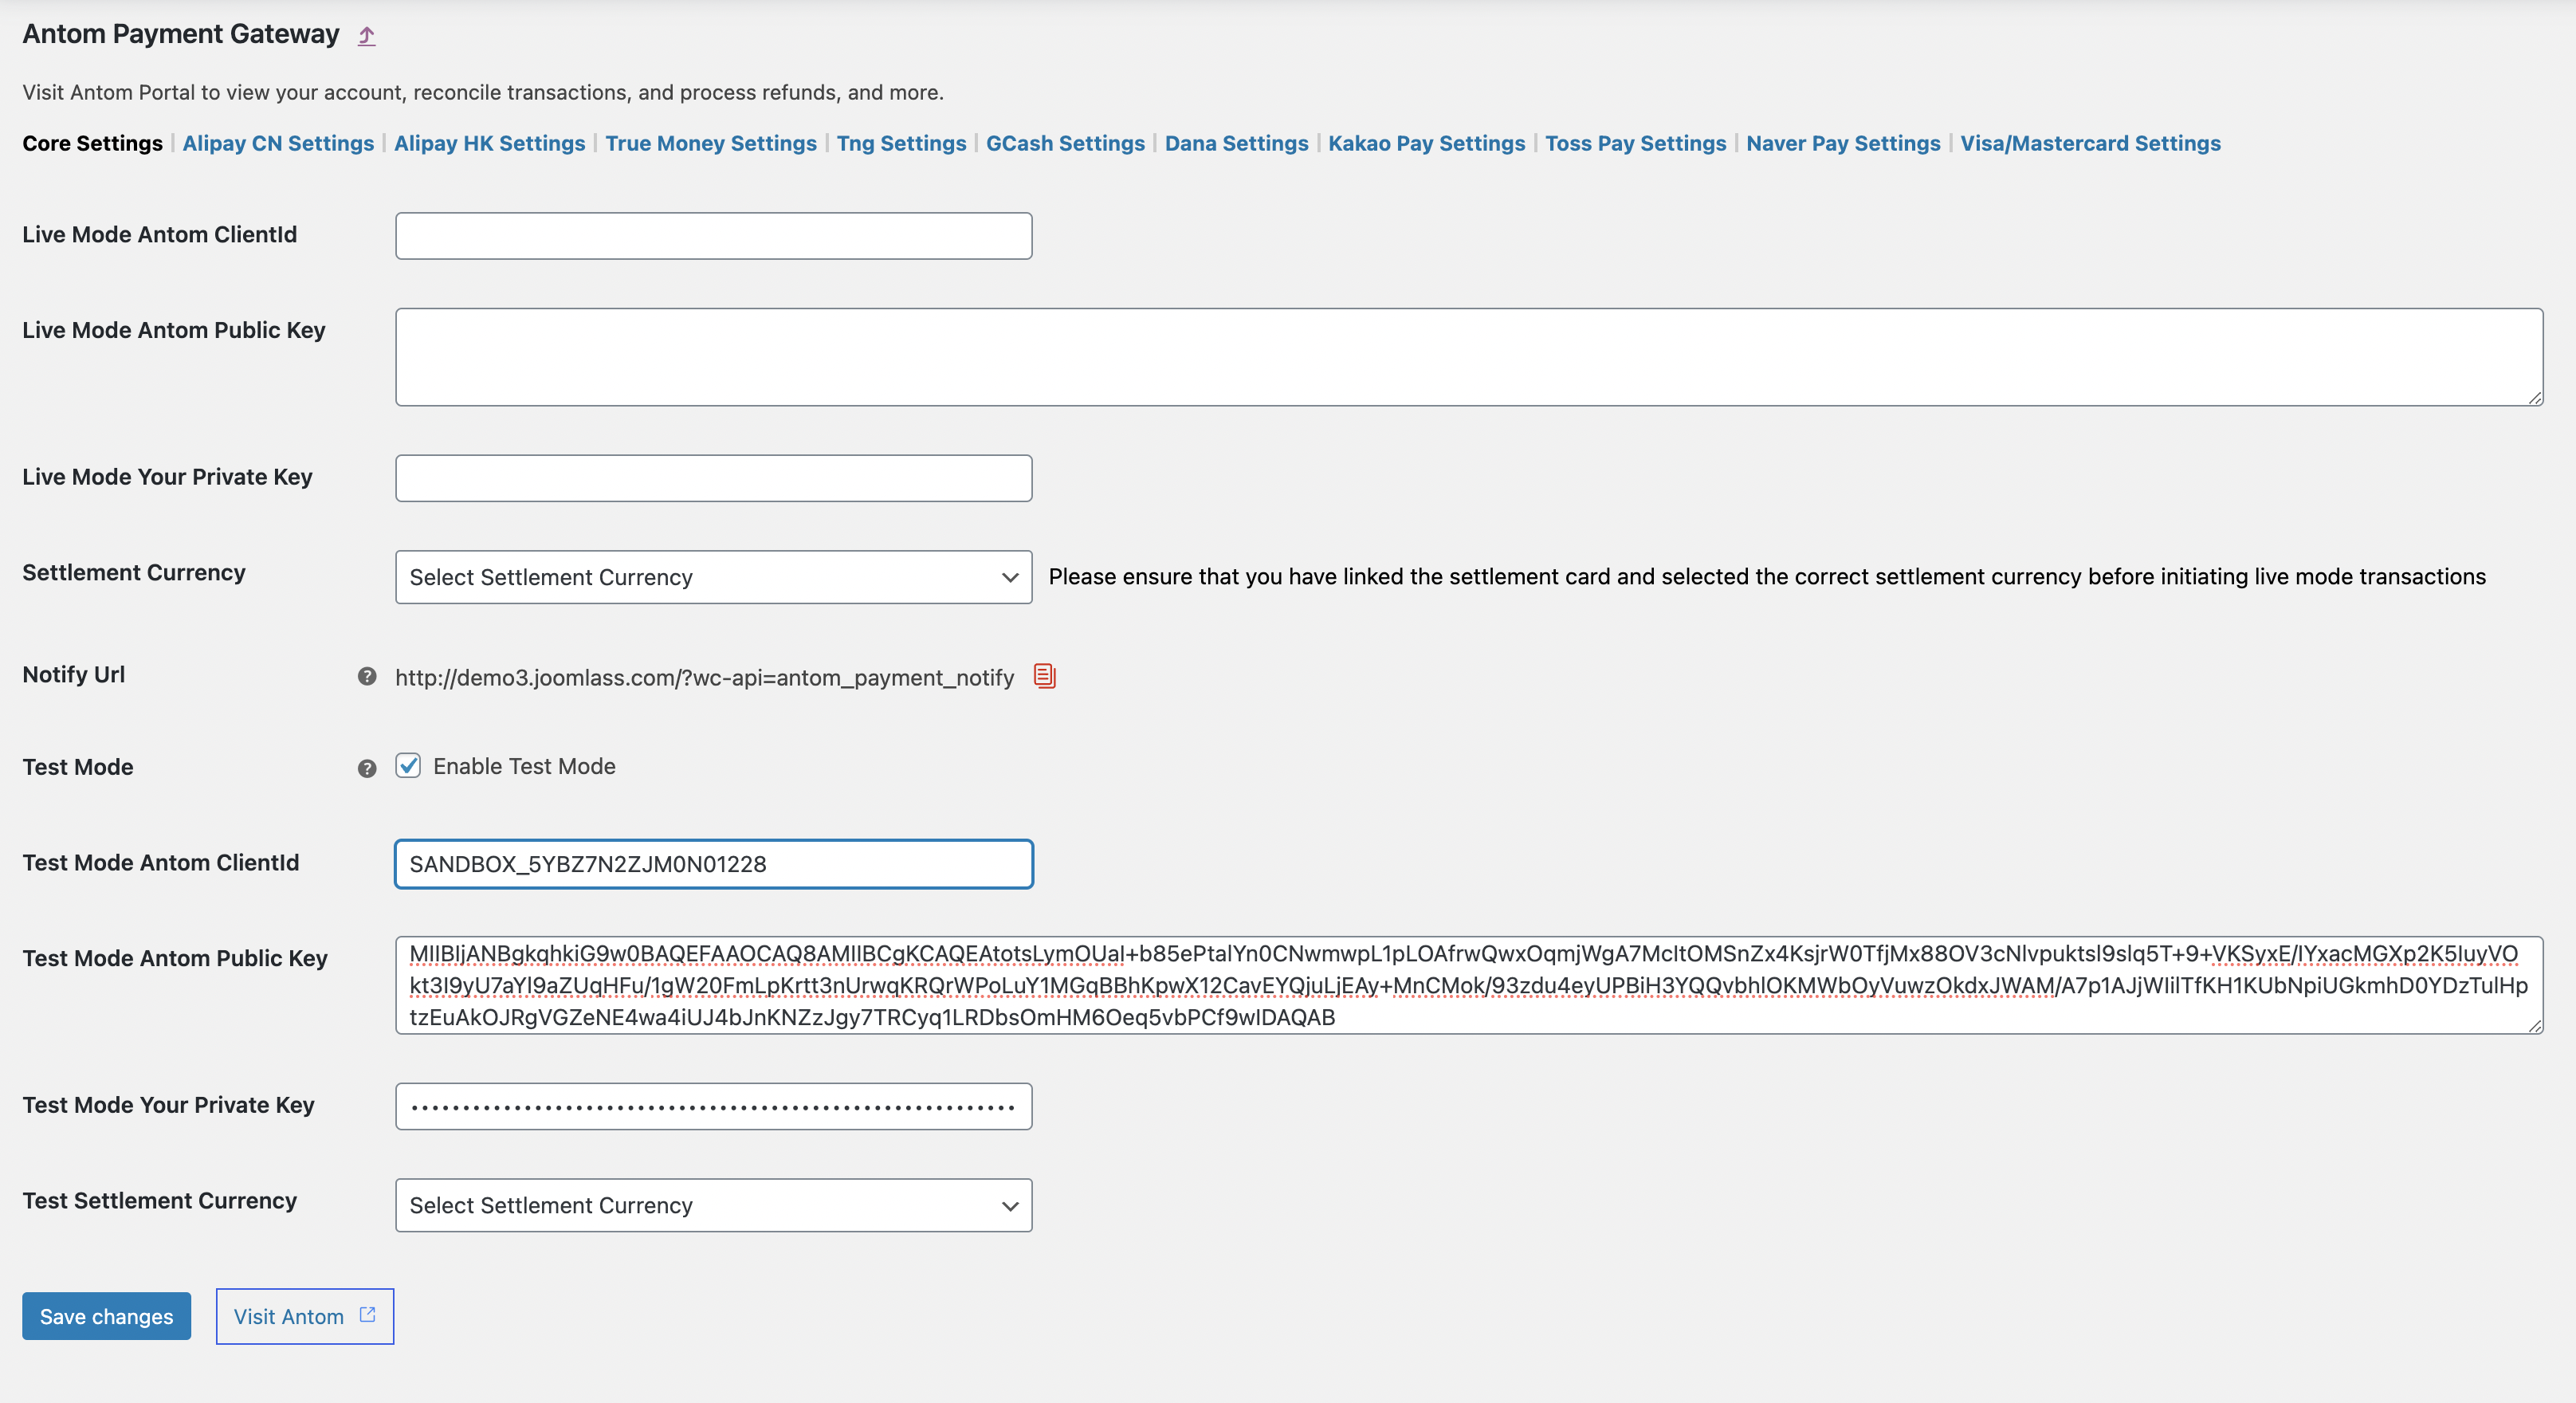
- Click Visit Antom to obtain configuration information in test mode. Refer to Antom Dashboard for the detailed process.
Note: Enable the test mode on Antom Dashboard to obtain configuration information for the test mode.
- Configure the Notification URL in test mode to receive payment notifications.
- Go to your store and add a product to your cart.
- Proceed to checkout.
- Enter the required billing details. We recommend using a real email address so that you can receive the order confirmation.
- Select the wallet payment provided by the Antom Payments plugin.
- Check the terms and conditions box.
- Click Place order. You'll be redirected to the code-scanning page. Use the wallet app scan the code and complete the payment.
- Sign in to your WordPress account as an administrator.
- Select WooCommerce in the left menu. Your test order is displayed with a Processing status. You can also view this order payment request in Antom Dashboard.
Antom Dashboard
Activate your account
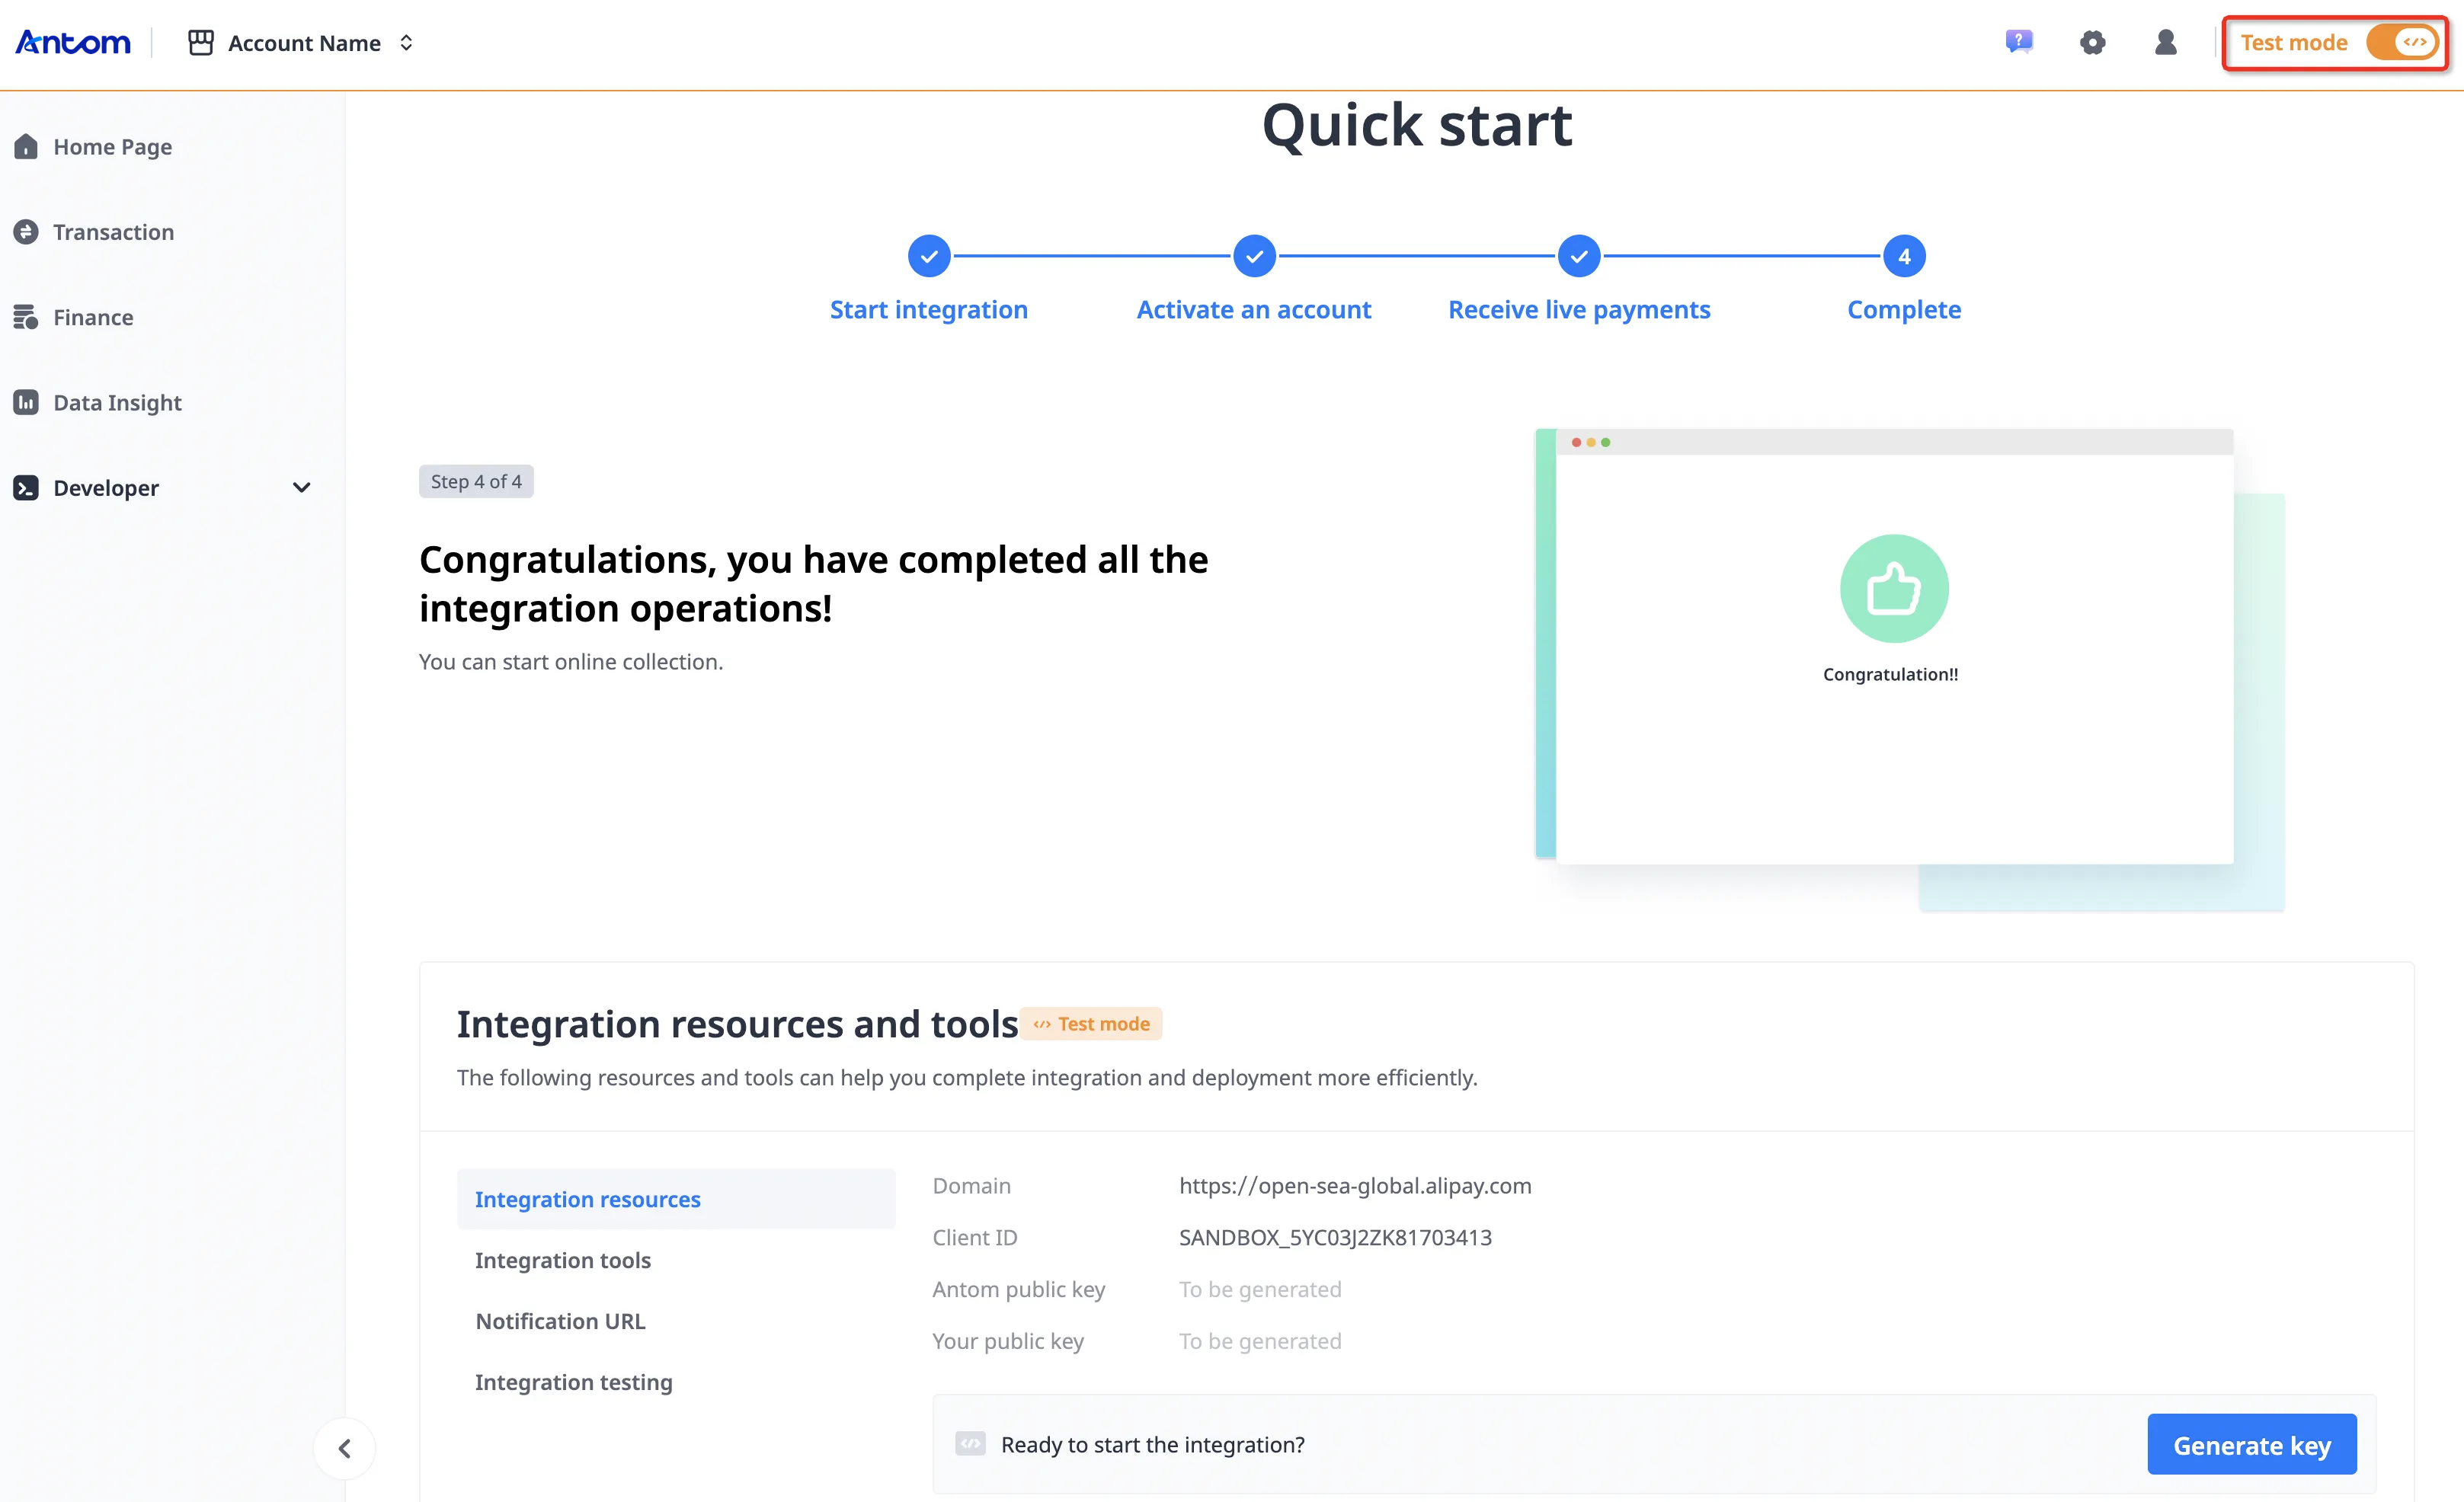
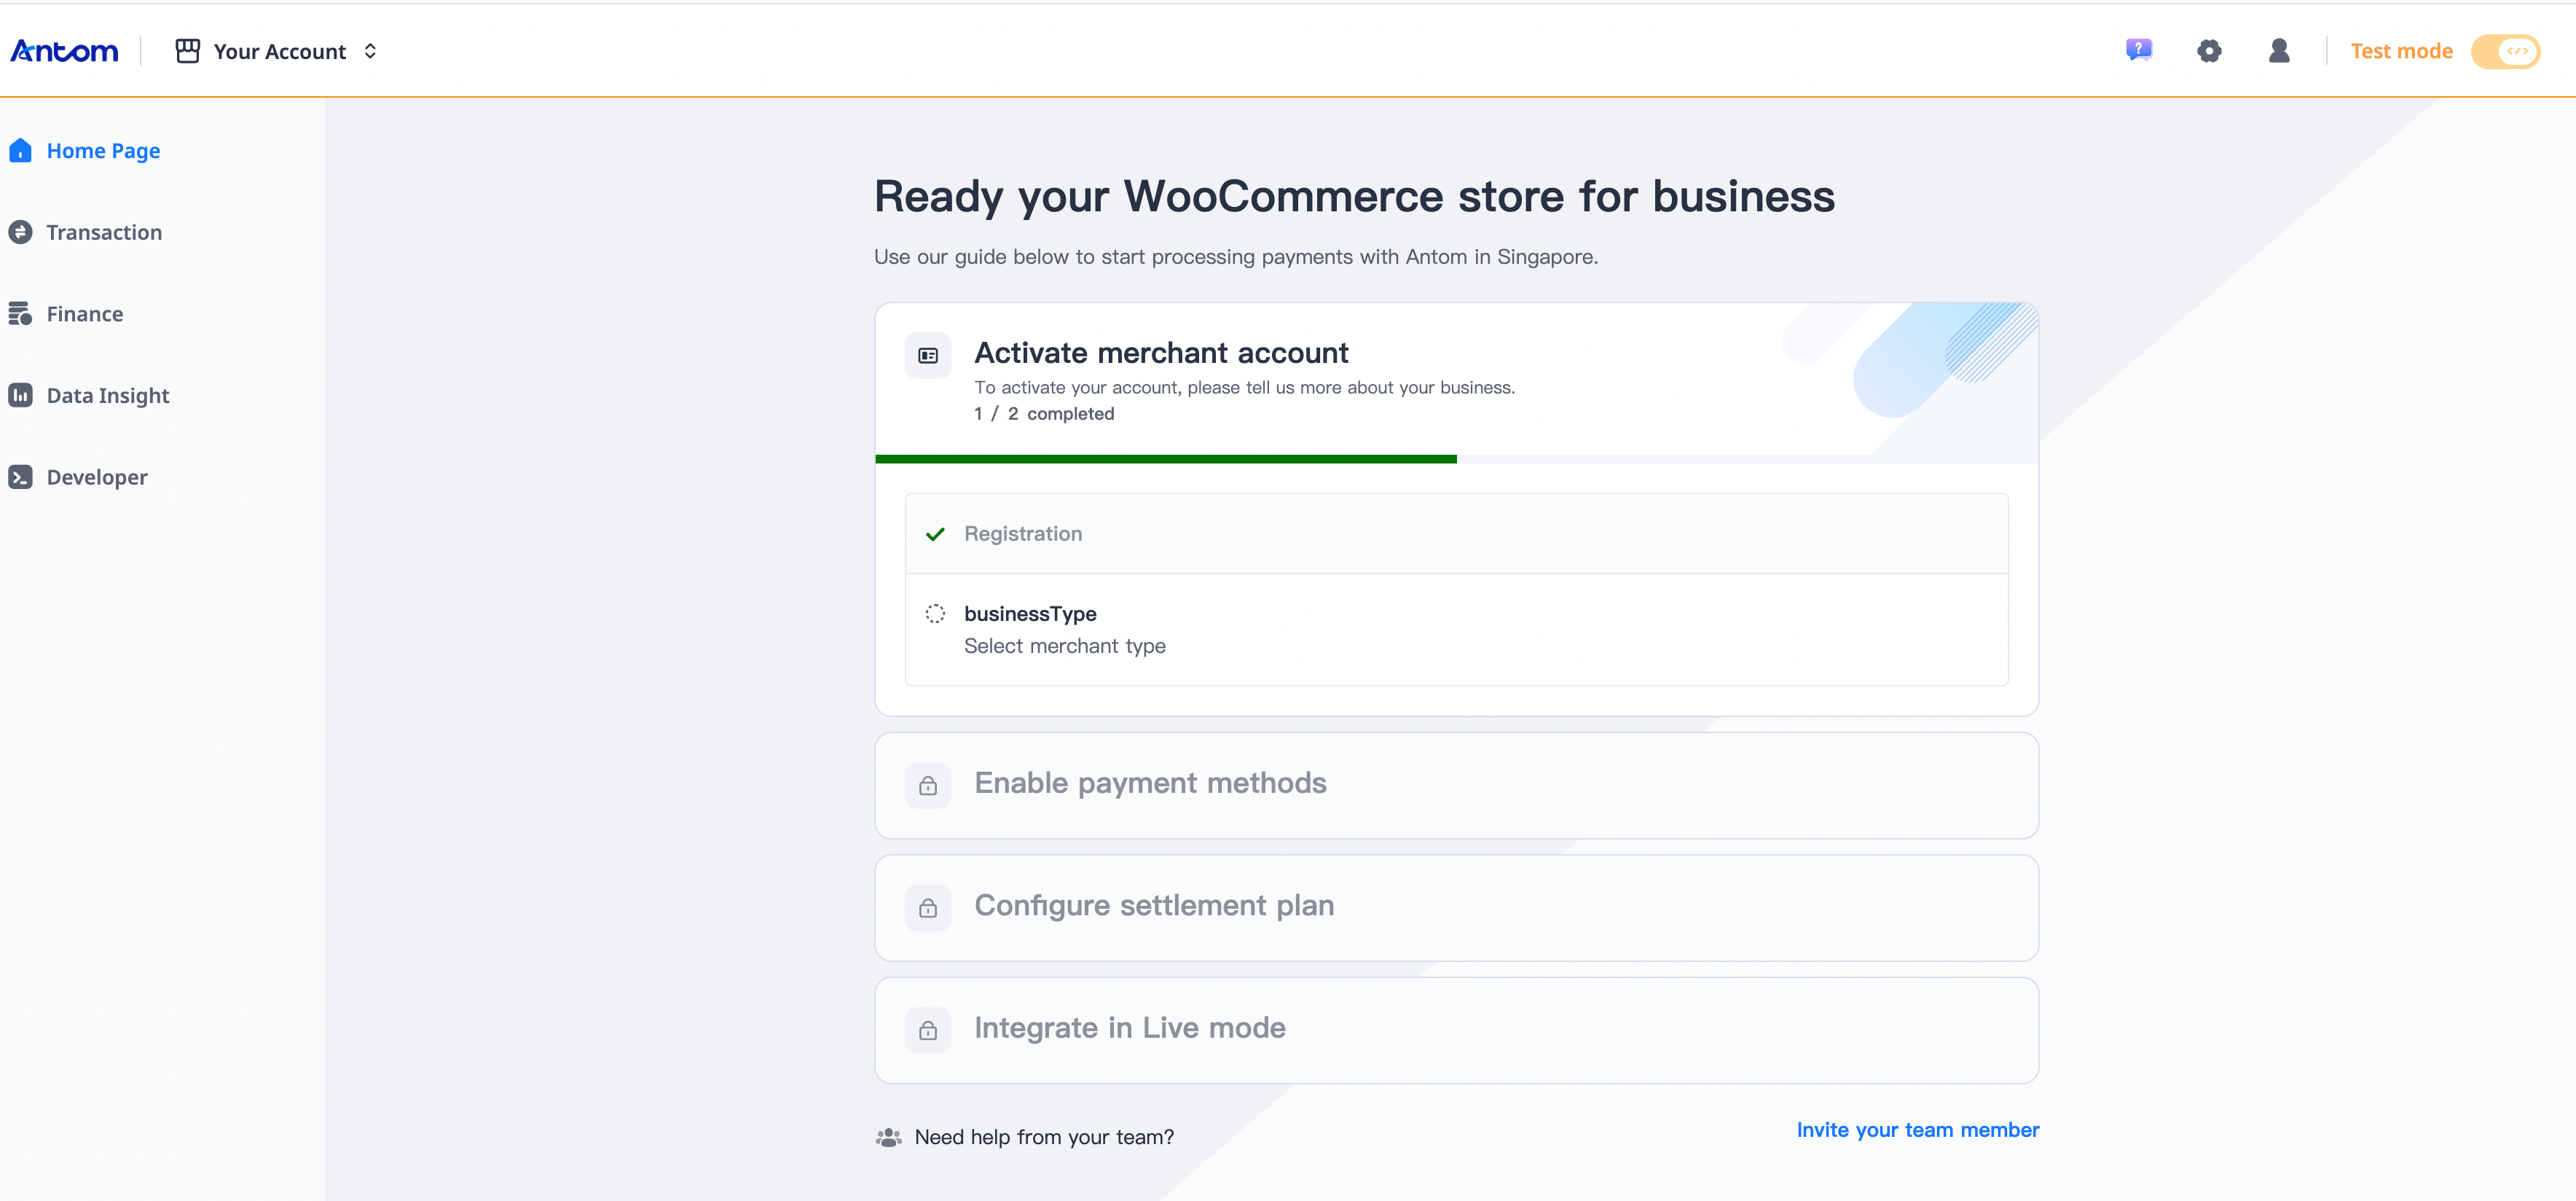
After registering your account, log in to Antom Dashboard, click Activate merchant account on home page, fill in your business information in the displayed form, and submit it for approval to activate your account.
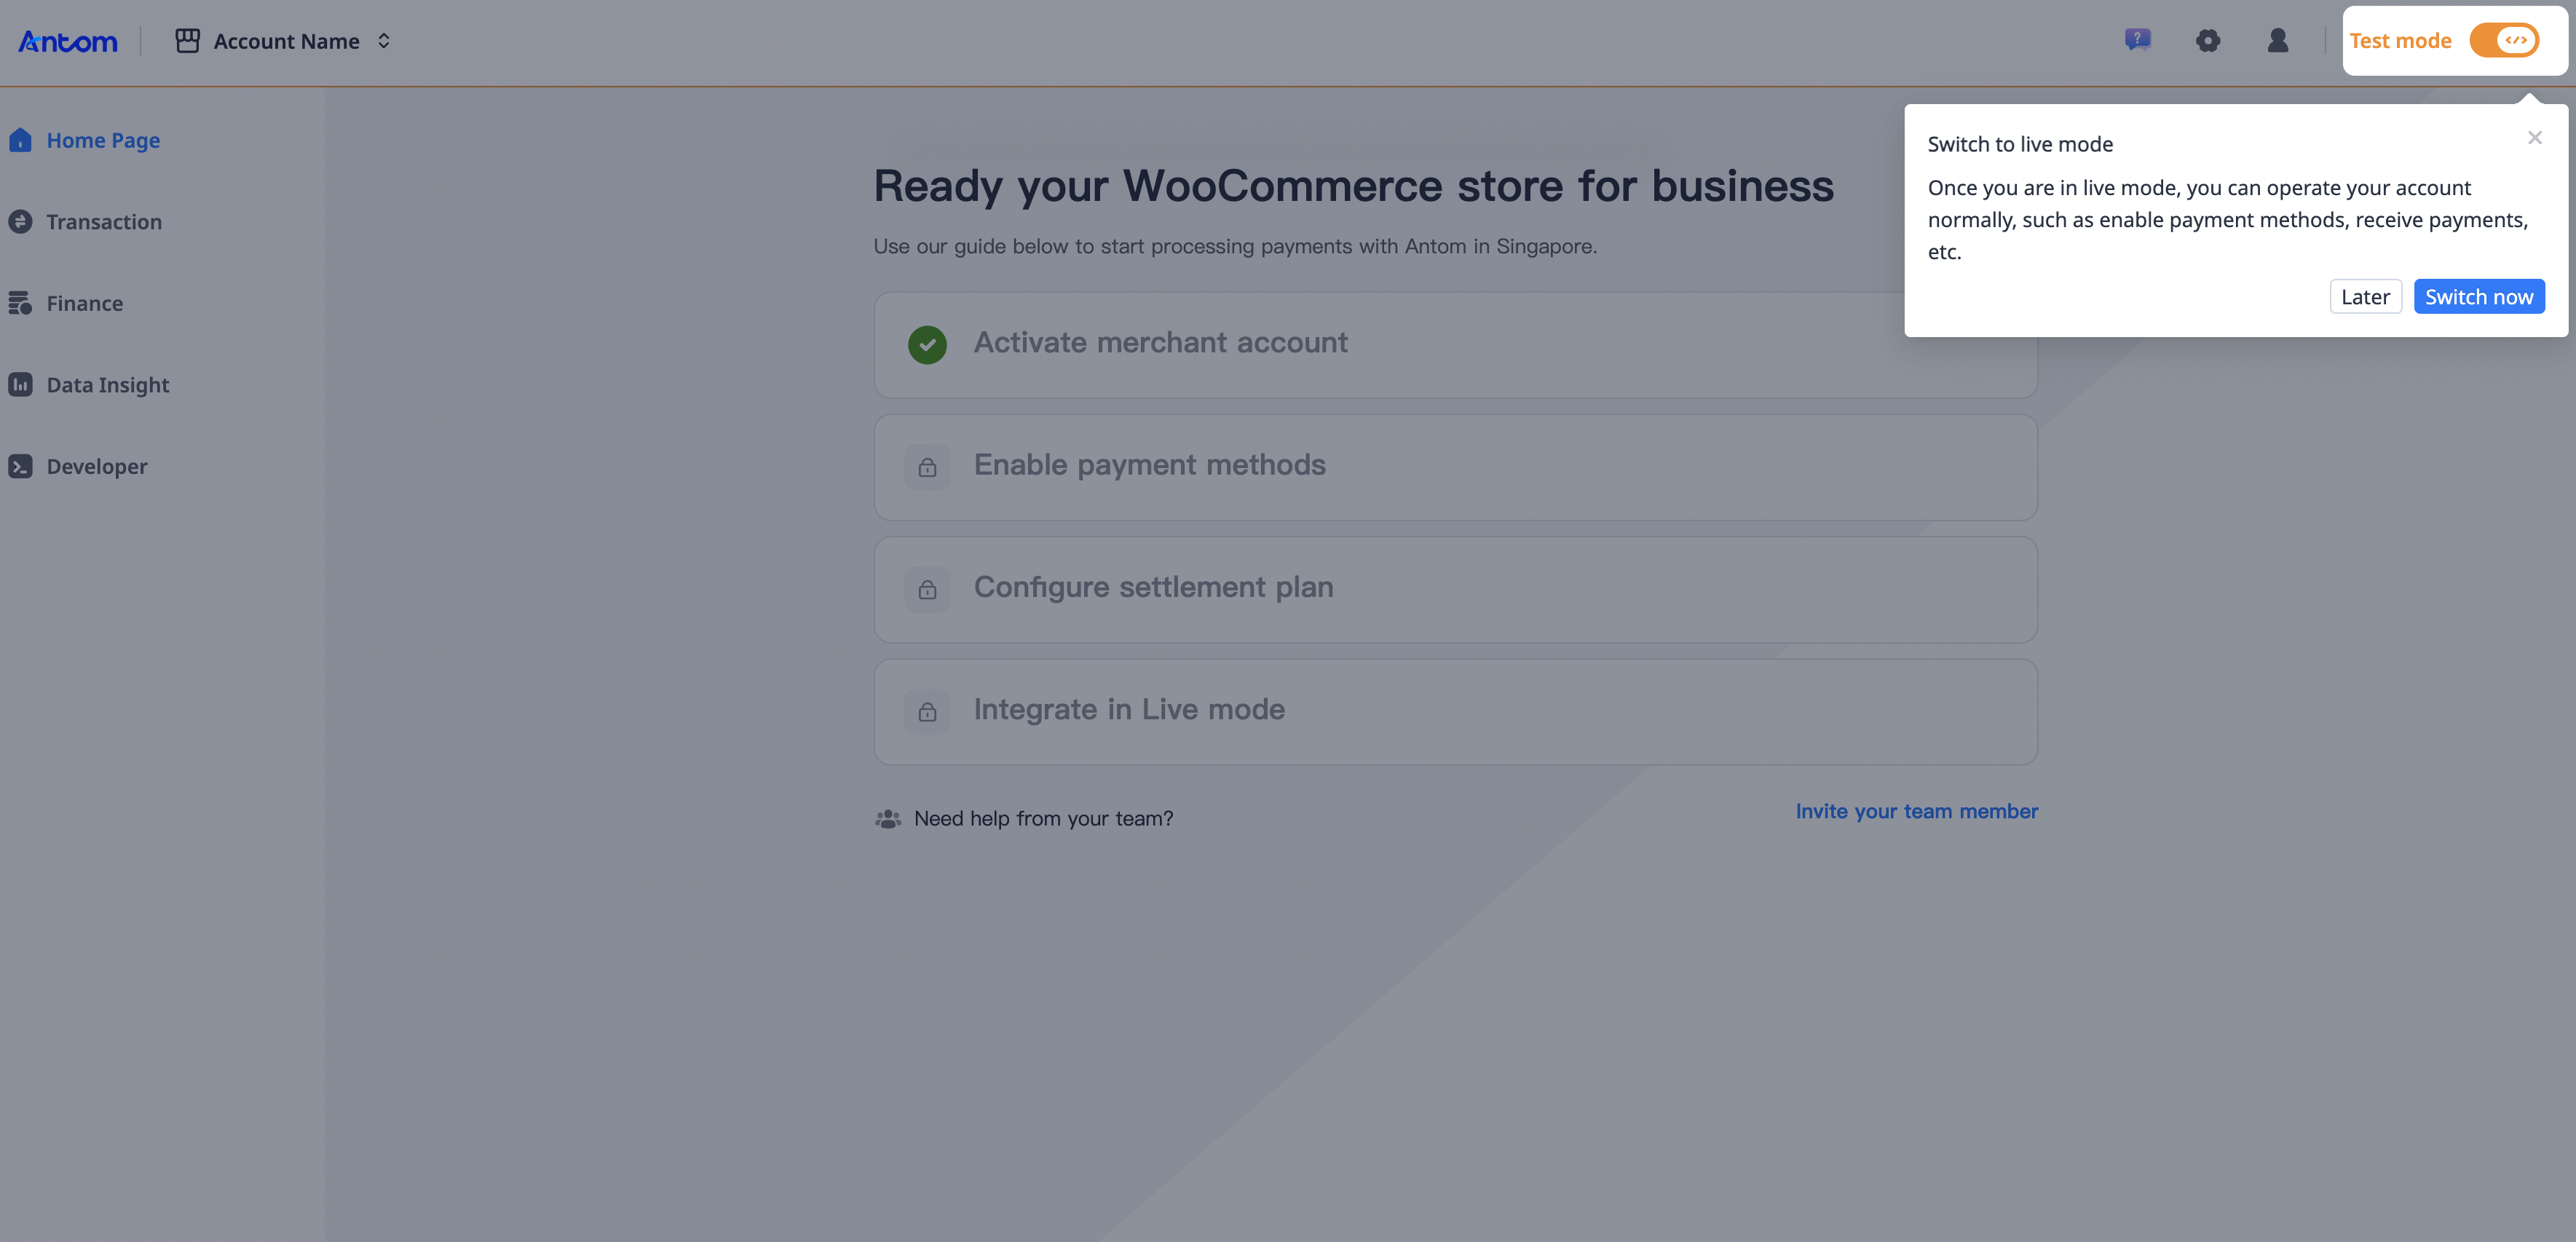
Once your account is activated, the page will prompt you to Switch to live mode. Switch to live mode to obtain the live mode configuration information required to use the plugin.
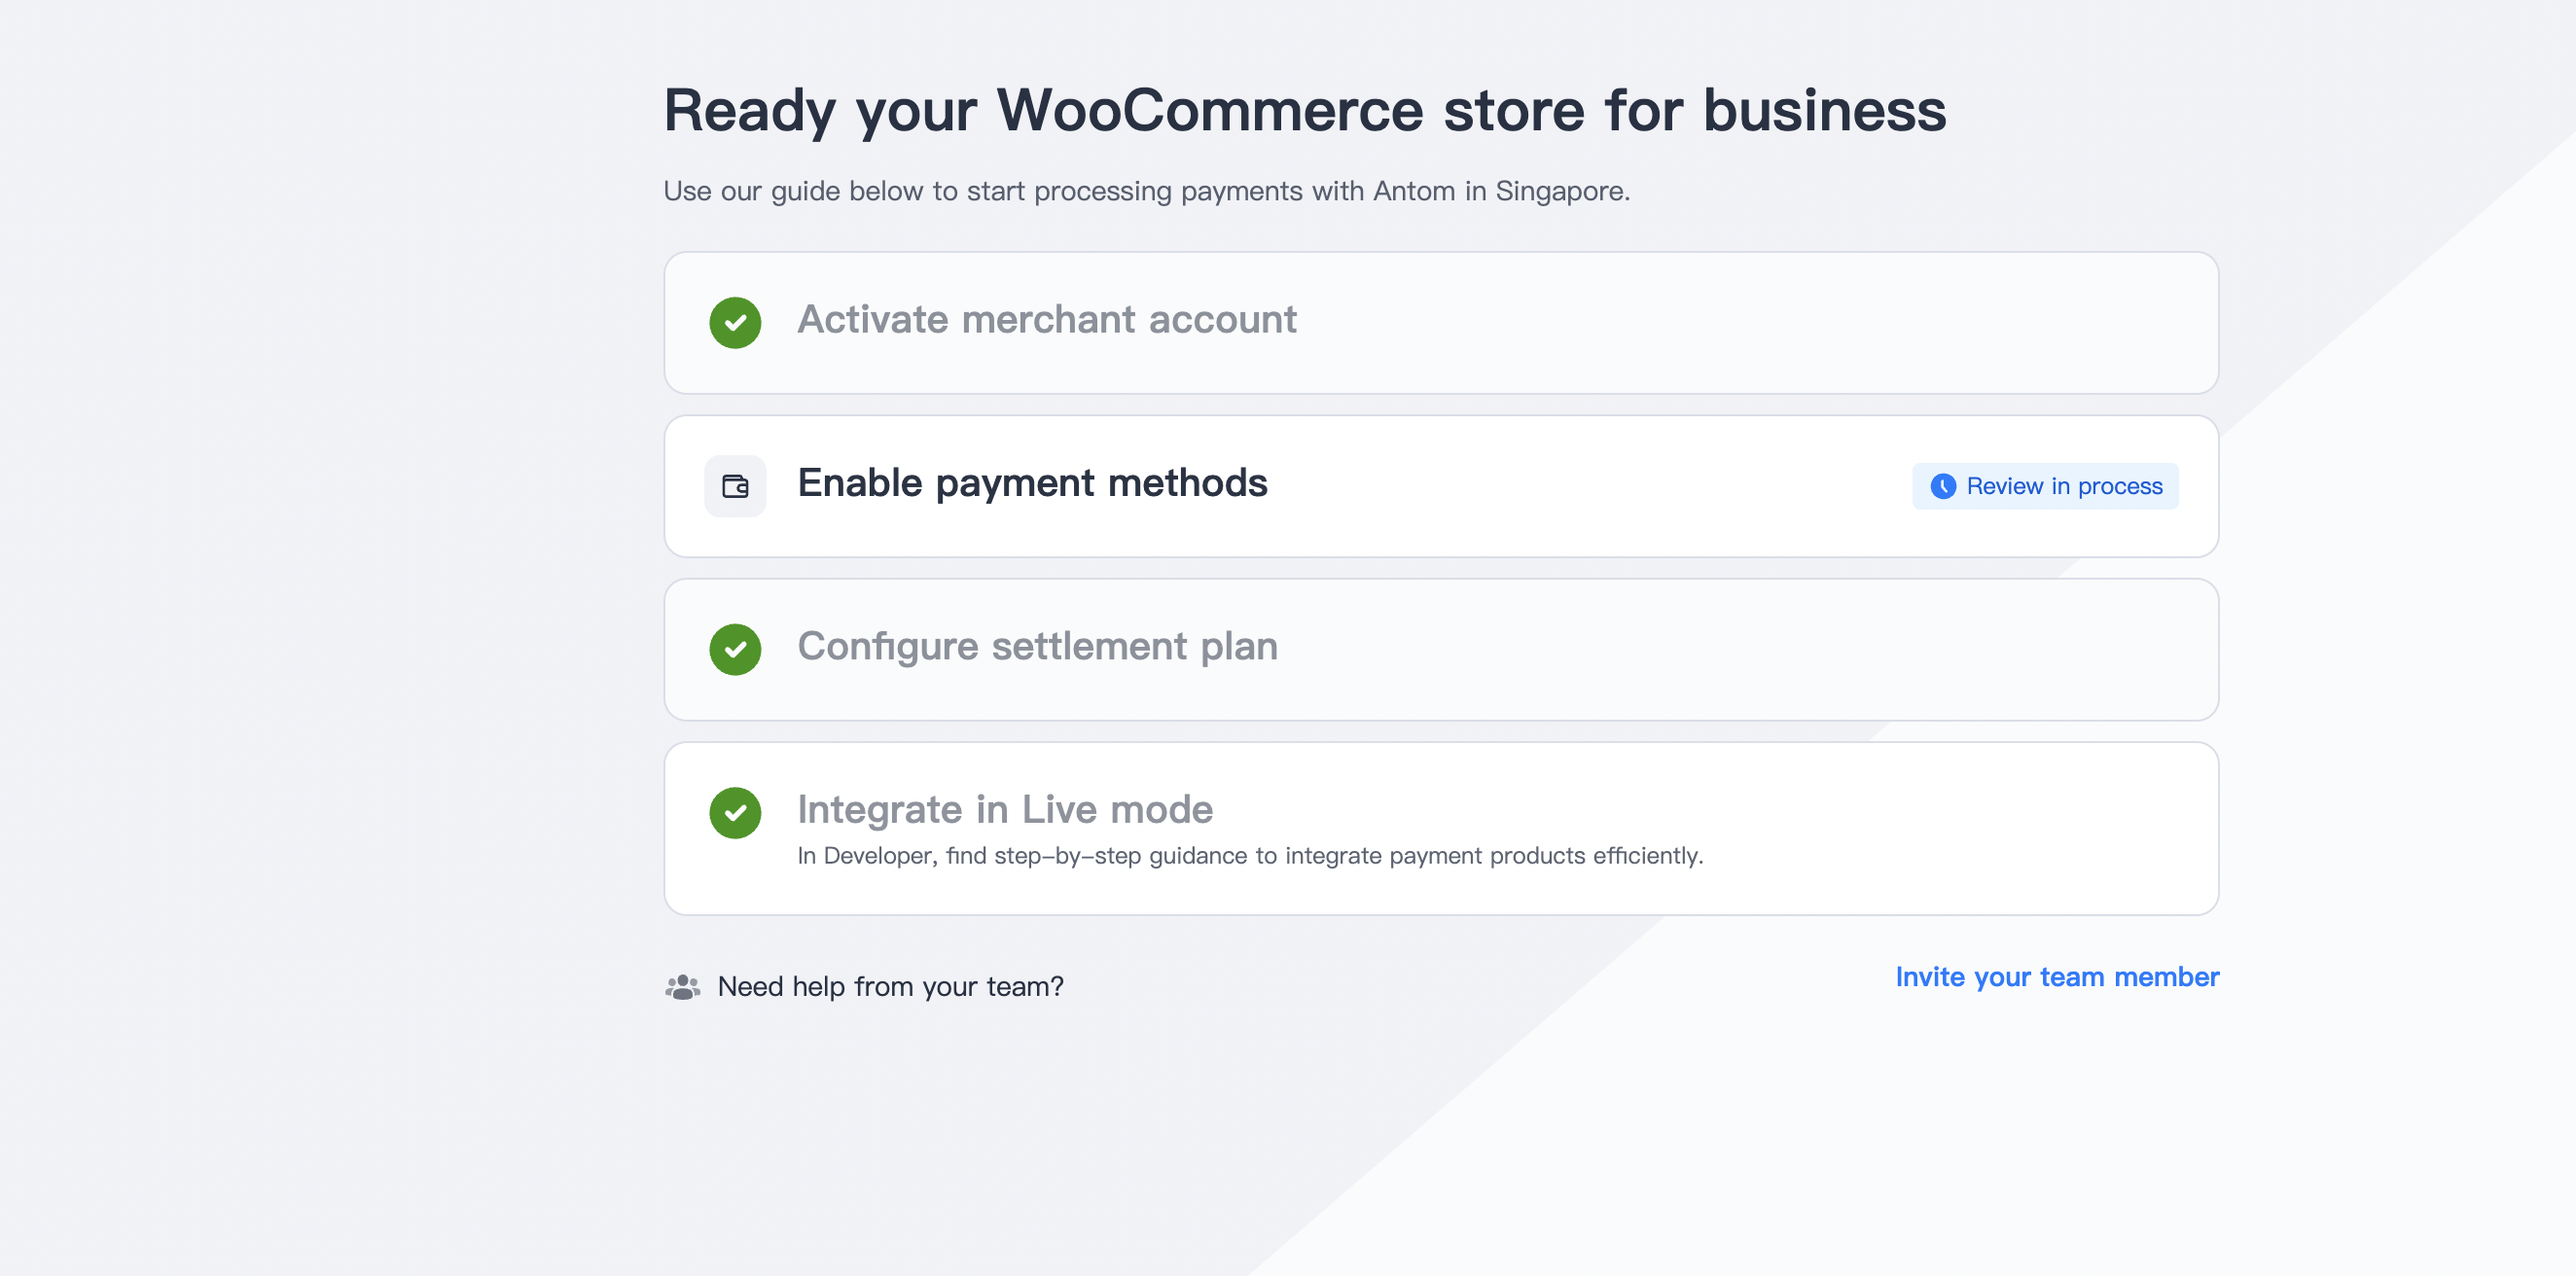
Enable payment methods
After activating your account, Antom will automatically enable payment methods for you. You can view the activation status of payment methods through Enable payment methods on the home page.
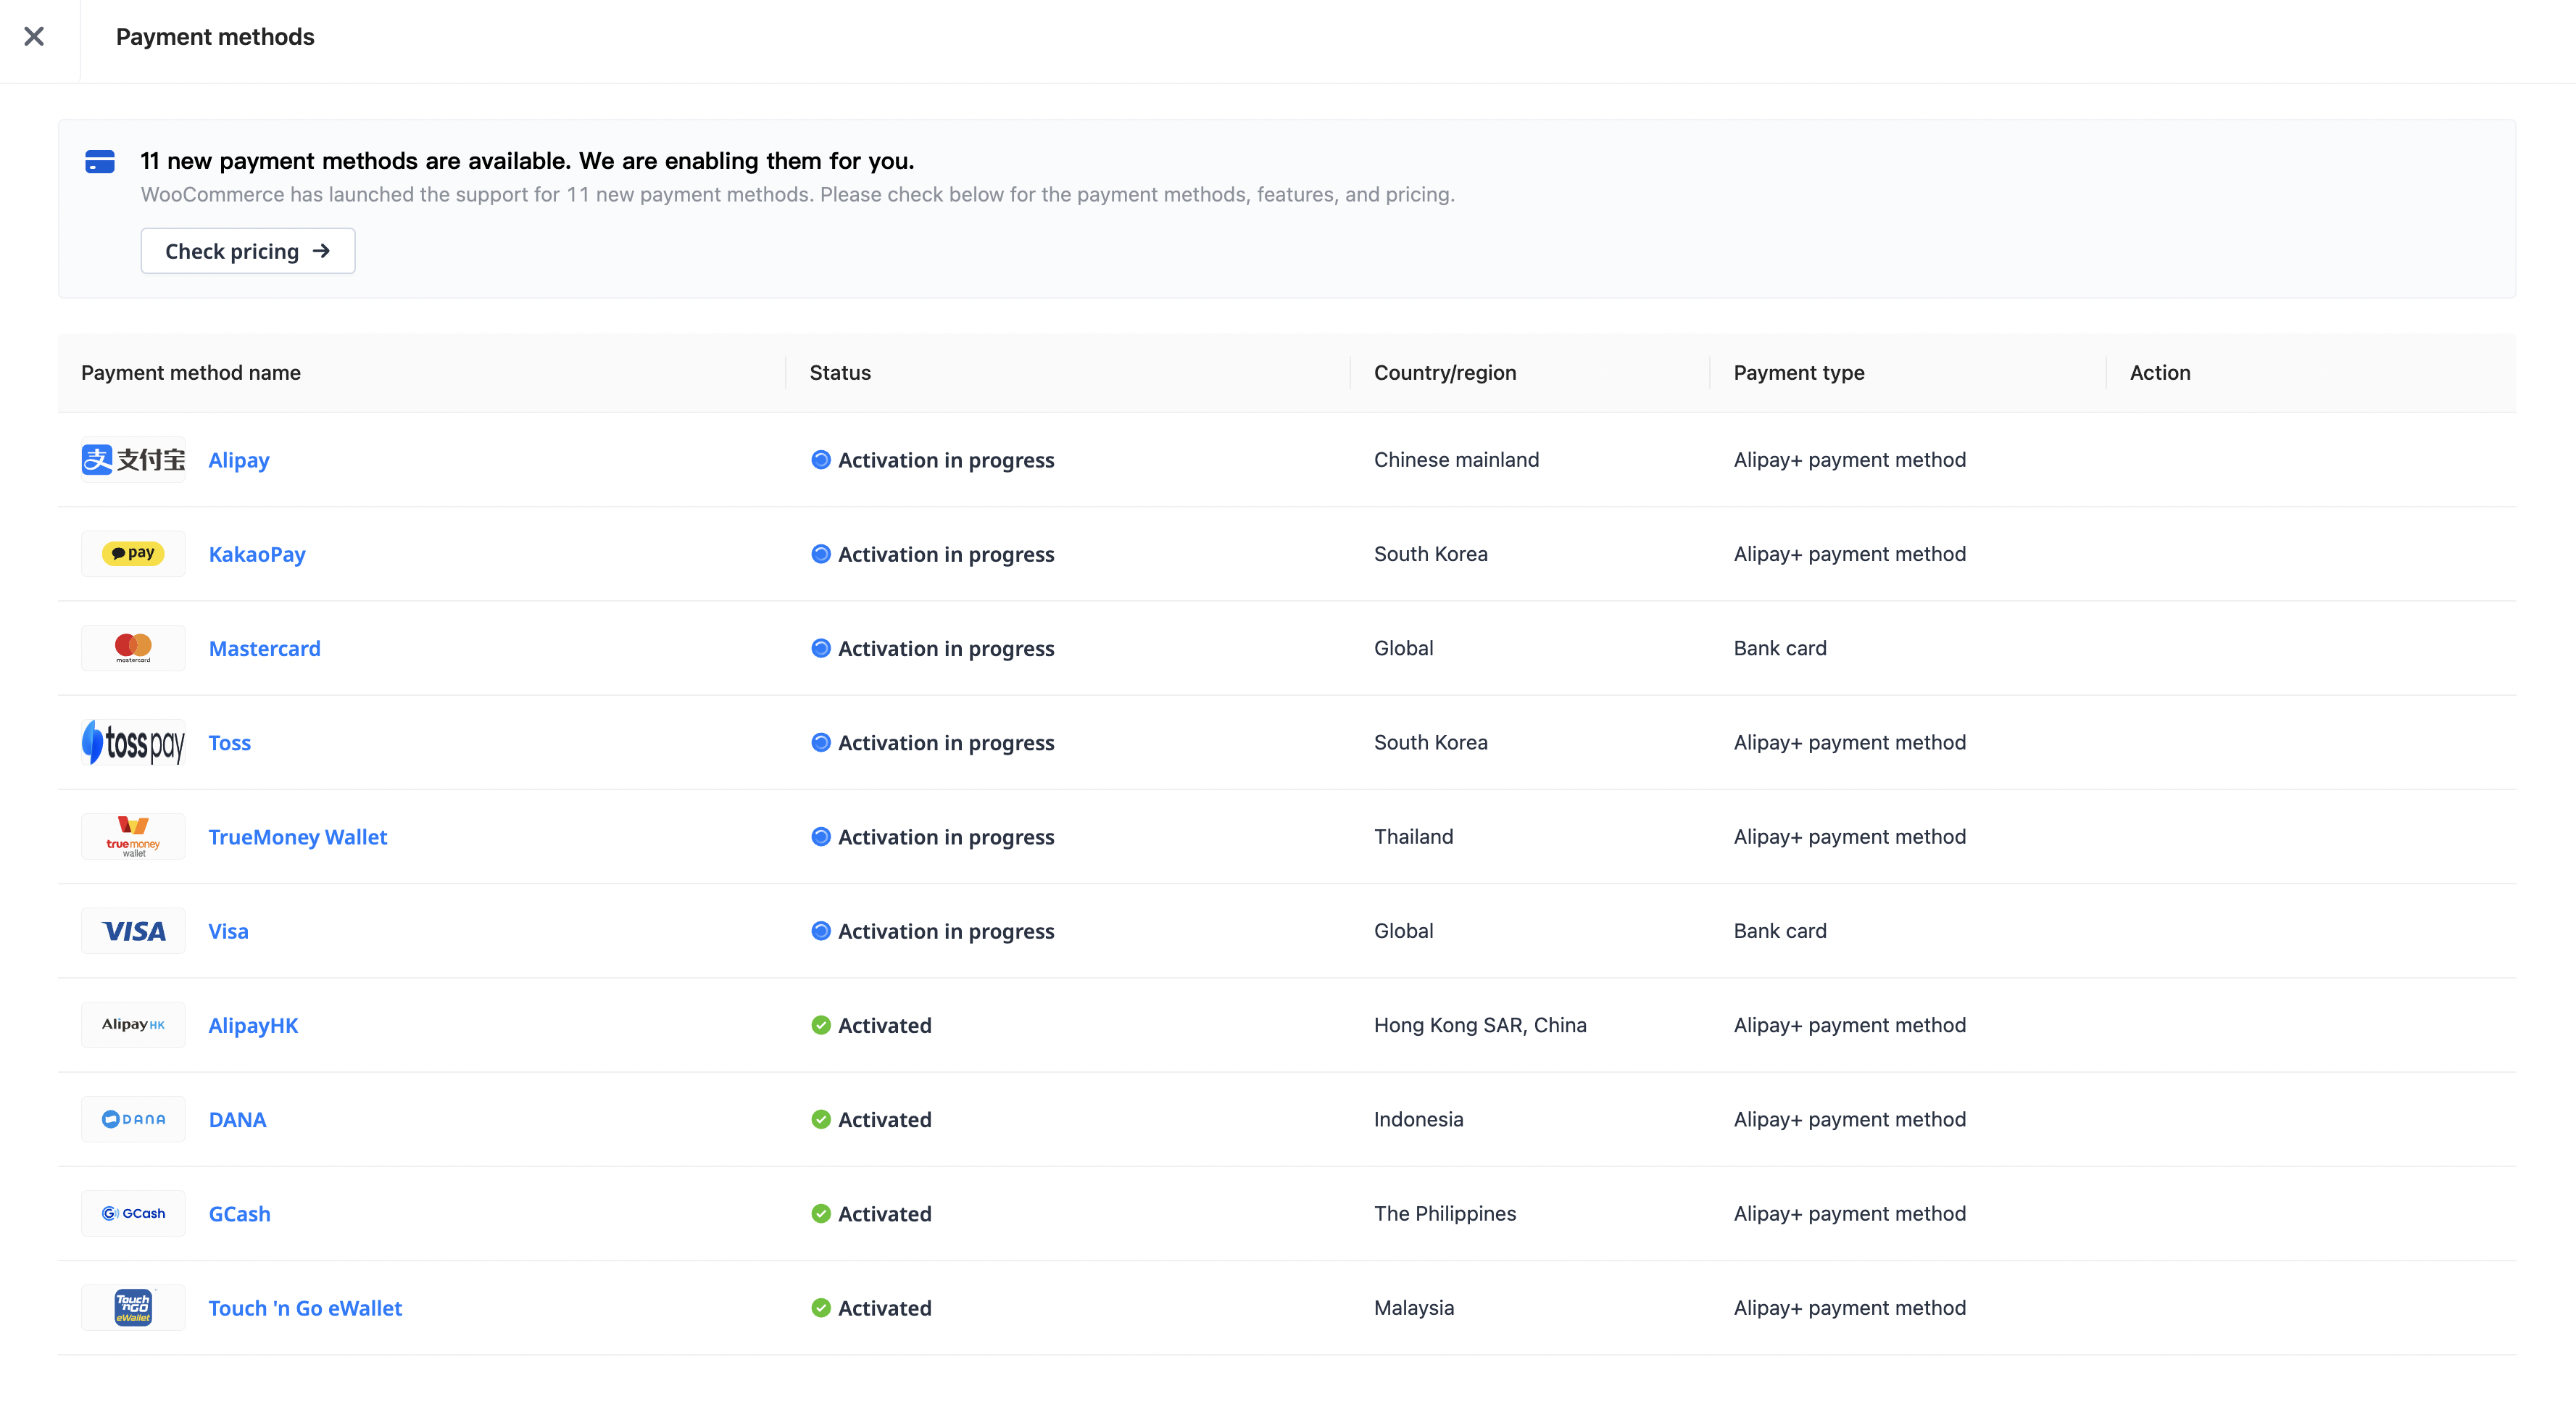
Once the payment method has been successfully activated, the status of the payment method on the Payment methods page will be displayed as Activated.
For payment methods that are not automatically activated, you can manually activate on this page.
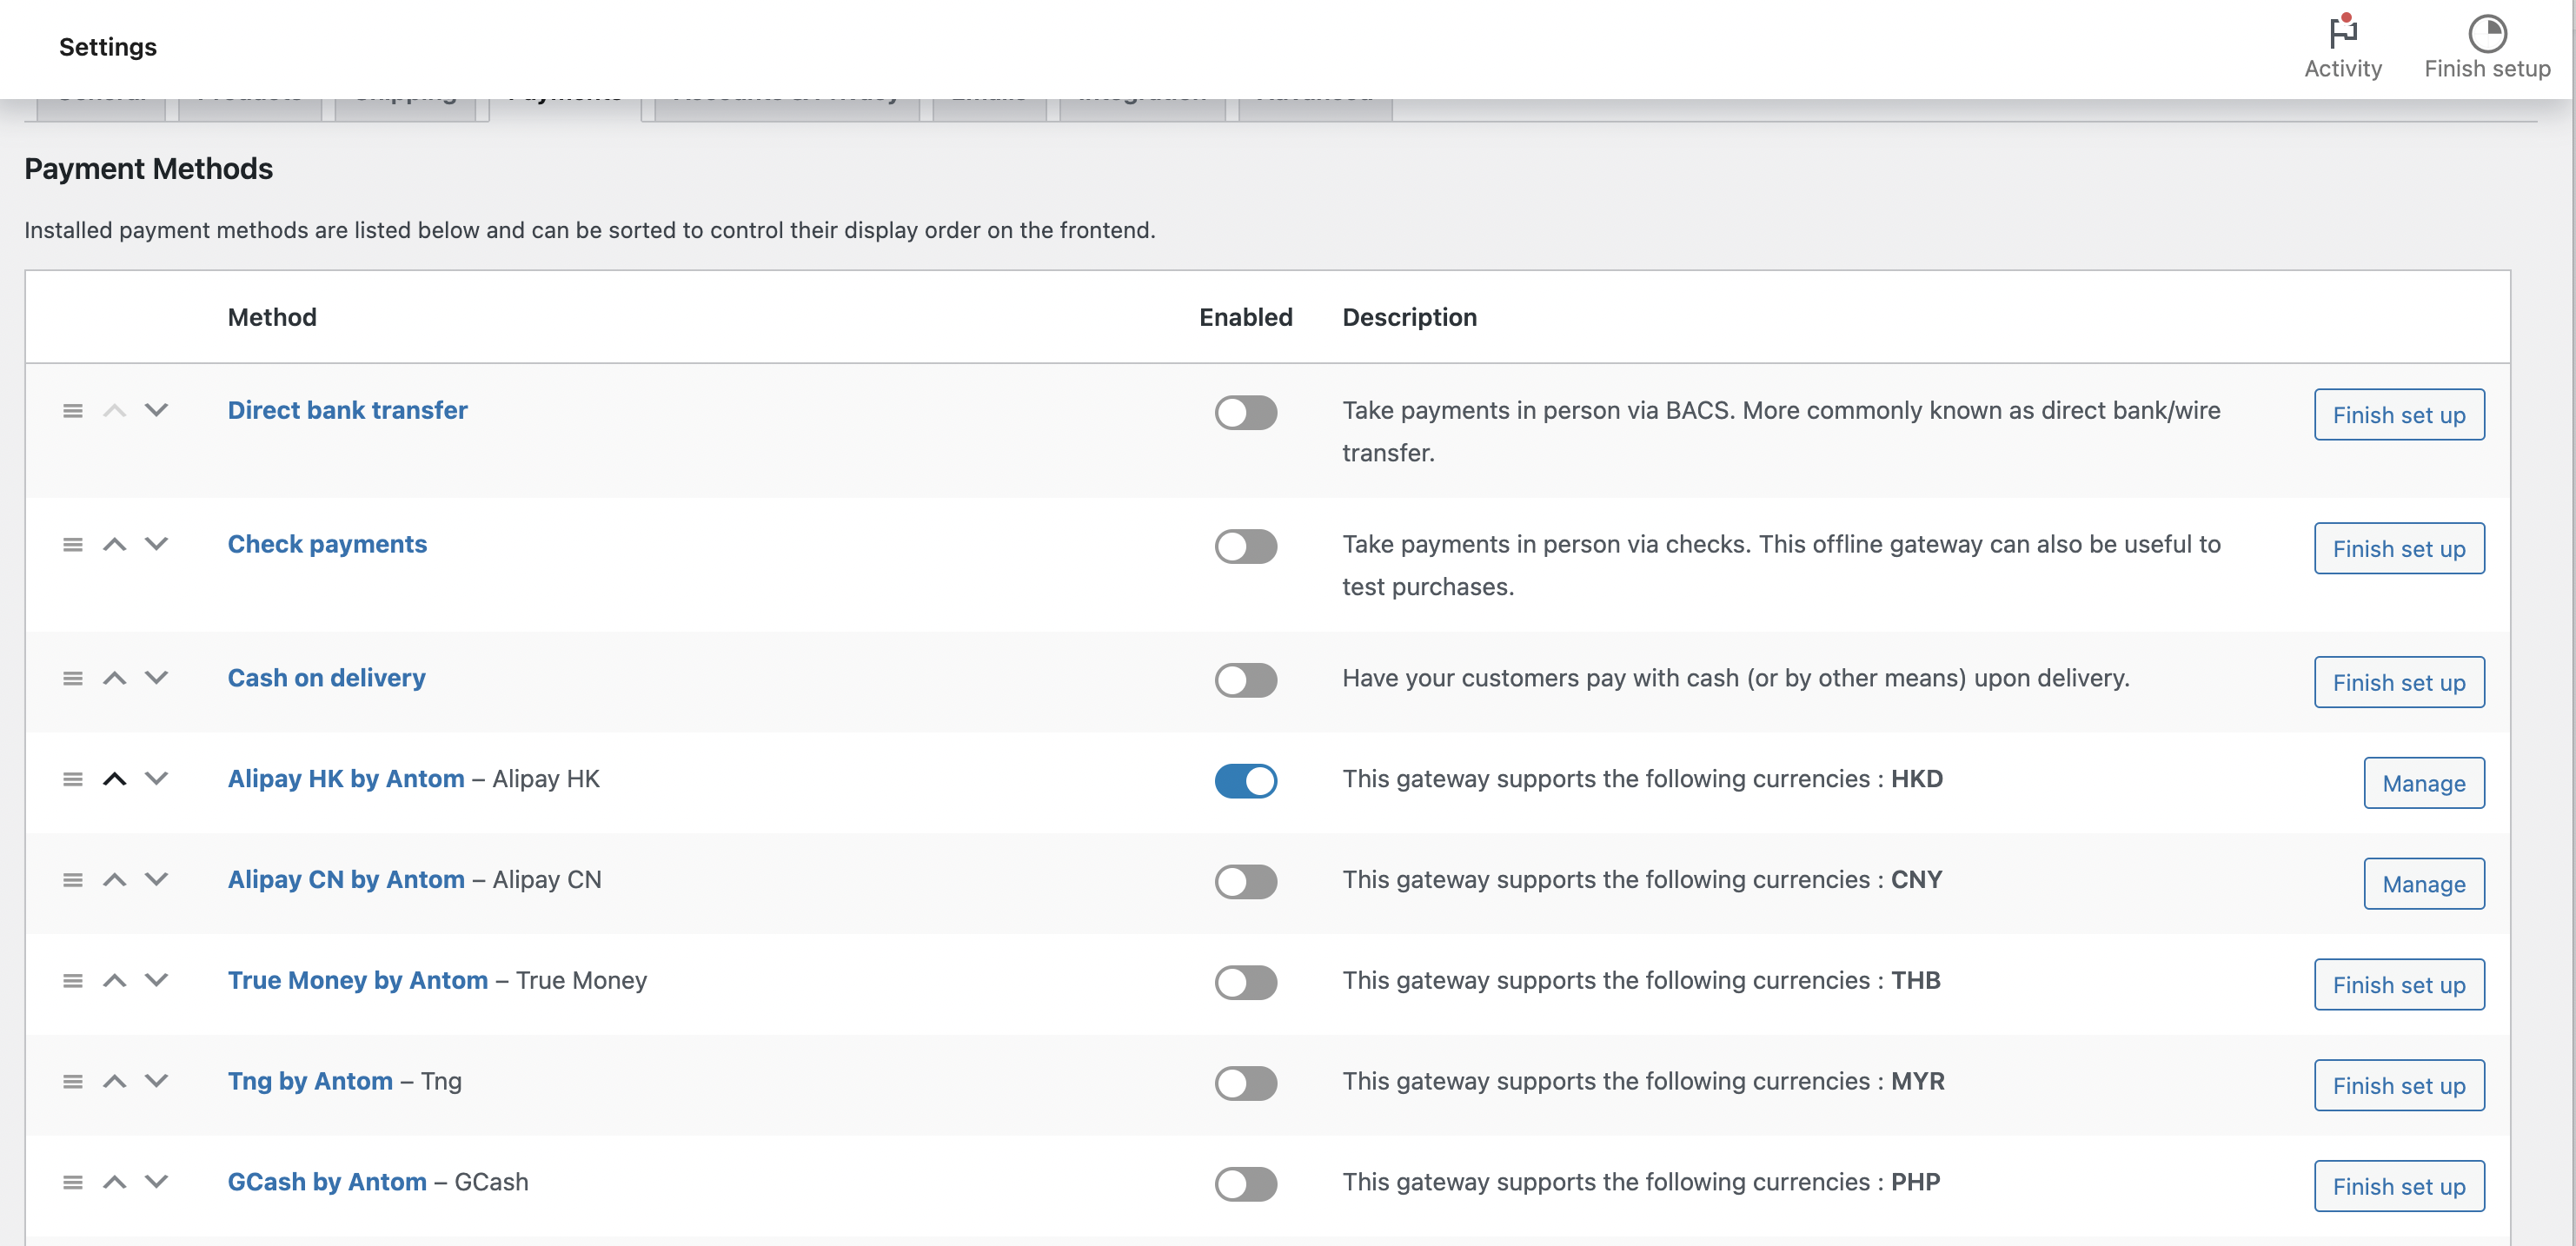
Go to plugin settings page and enable the activated payment method.
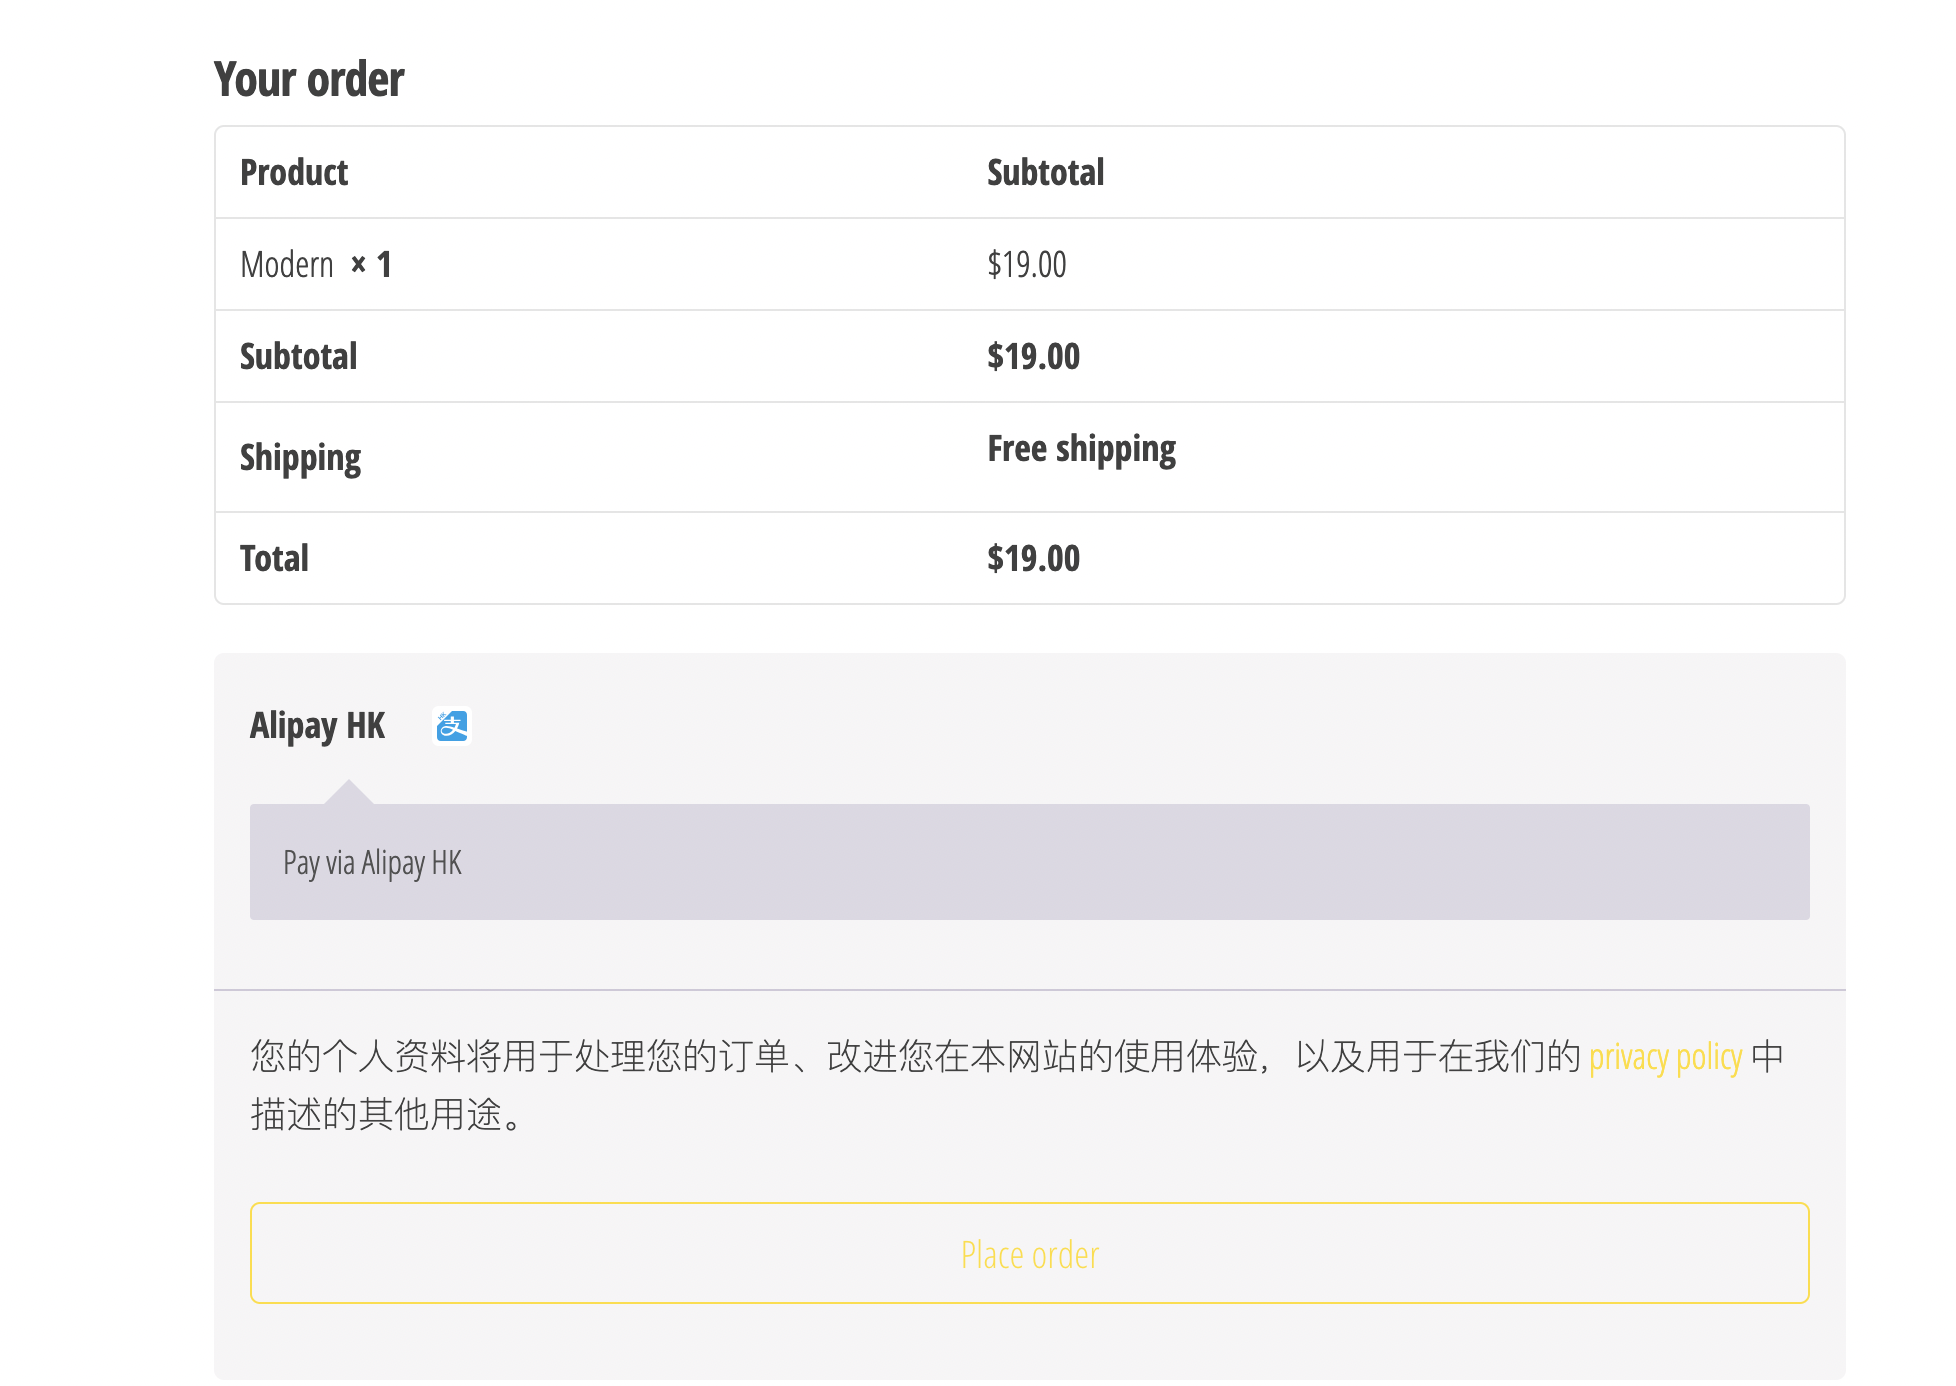
You will then be able to view the payment method on the checkout page.
Configure settlement plan
In live mode, you can change the settlement currency you need to use and bind the settlement card. Refer to Antom Dashboard to change the settlement currency.
Integration in live mode
When you initiate a payment in live mode, and the payment is successful, the Integrate in Live mode task will be marked as completed.
Congratulations! You have completed the configuration and use of the Antom Payment plugin. Enjoy the payment journey brought to you by Antom.

FAQs
Q1: Why do I receive order_is_closed after payment, and the page does not redirect to the QR code scanning page?
A: It is typically caused by a notification configuration error. Antom will send payment failure notification when a payment is deemed to have failed. WordPress plugin fails to correctly receive the verification notification, resulting in incorrect maintenance of the payment order status associated with this order, triggering an idempotent request.
You need to correct your notification and key configuration and initiate the payment again with the new order number.
Q2: How can I obtain the Antom Public Key in plugin configuration page?
A: Log in to Antom Dashboard and go to the Key configuration page.
- If you want to obtain Live Mode Antom Public Key, click on the Test mode button to switch to live mode and obtain Antom public key.

- If you want to obtain Test Mode Antom Public Key, click on the Test mode button to switch to test mode and obtain Antom public key.


