Add new JSAPI via extension
Background
The Mini Program SDK provides a number of built-in JSAPIs that developers can use right away, for example, my.request() for a mini program to make network requests to an API endpoint, my.setStorage() and my.getStorage() for data persistency, and my.getLocation() to return the current device location. While these JSAPIs are sufficient for most of the scenarios, there are still cases where custom JSAPIs are needed.
The Mini Program SDK is extensible and allows you to add new functionalities. Simply add an Extension to your Android and iOS app, register in the Mini Program Platfrom, and assign a permission scope. Then this new JSAPI will be ready for your mini program developers to use.
This document helps integrators to customize their own JSAPI or replace the default JSAPI implementation from Griver AppContainer.
Create new JSAPI
Implement JSAPI
Step 1 - Add a new class
Create a new class that extends SimpleBridgeExtension.
public class TestBridgeExtension extends SimpleBridgeExtension {

}
Step 2 - Add a new method
Add a method inside this class. Use the name of this method as the JSAPI's name.
public class TestBridgeExtension extends SimpleBridgeExtension {

    @ActionFilter(canOverride = false)
    @ThreadType(ExecutorType.UI)
    public void testAPI(){

    }
}
There are two annotations that you can assign to the newly created method.
Annotation | Description | Value |
| declare a JSAPI Method |
If you do not want this JSAPI to be overridden, you can set The default value is |
| JSAPI running thread |
: Main Thread : IO Thread : NETWORK Thread |
Step 3 - Add parameters
Add a few parameters to this method. There are mainly 3 types of parameters, which come with respective annotations. The Mini Program SDK will inject these parameters during runtime.
Parameter | Annotation | Description | Value |
Context |
| The current page of the mini program |
You can get some context-related information, such as startup params and page ID, from the |
Business |
| The business-related parameter Please note that only the following primitive types are allowed.
|
|
Callback |
| The callback parameter |
|
public class TestBridgeExtension extends SimpleBridgeExtension {

    @ActionFilter(canOverride = false)
    @ThreadType(ExecutorType.UI)
    public void testAPI(@BindingNode(Page.class) Page page,
                        @BindingParam(intDefault = 1) int intParam1,
                        @BindingParam(stringDefault = "ABC") String stringParam2,
                        @BindingCallback BridgeCallback bindingCallback){

    }
}
Here are two parameters we added:
intParam1: Integer type. Its default value is 1.stringParam2: String type. Its default value is 'ABC'.
The bindingCallback is a callback object that allows you to return a response to the mini program.
Step 4 - Implement the method and return a response
public class TestBridgeExtension extends SimpleBridgeExtension {

    @ActionFilter(canOverride = false)
    @ThreadType(ExecutorType.UI)
    public void testAPI(@BindingNode(Page.class) Page page,
                        @BindingParam(intDefault = 1) int intParam1,
                        @BindingParam(stringDefault = "ABC") String stringParam2,
                        @BindingCallback BridgeCallback bindingCallback){

        // Construct a result object
        JSONObject result = new JSONObject();
        result.put("param1", intParam1);
        result.put("Param2", stringParam2);

        // Send the result back to Mini Program
        bindingCallback.sendJSONResponse(result);

    }
}
We basically echo back the input parameters in the above example. And we recommend you use json as the response format so that the mini program can process it easily.
If this JSAPI fails to execute, you should build BridgeResponse.Error to pass the error code and error message or use the built-in error such as UNKNOWN_ERROR.
@ActionFilter
@ThreadType(ExecutorType.UI)
public void test(@BindingApiContext ApiContext apiContext,
                 @BindingCallback BridgeCallback bridgeCallback) {
    bridgeCallback.sendBridgeResponse(BridgeResponse.UNKNOWN_ERROR);
}
If this JSAPI fails to execute and you want to customize the error code and error message, please note that if you set any error or error message in JSONObject, the mini program will receive a failure callback, otherwise a success callback.
@ActionFilter
@ThreadType(ExecutorType.UI)
public void test(@BindingApiContext ApiContext apiContext,
                 @BindingCallback BridgeCallback bridgeCallback) {
    JSONObject result = new JSONObject();
    result.put("error", "Your error code");
    result.put("errorMessage", "Your error message");
    bridgeCallback.sendJSONResponse(result);
}
Register JSAPI to Griver
Wrap up the Extension that you created with a GriverBridgeManifest, and specify the name of the JSAPI (i.e., testAPI) in the manifest. Use Griver.registerBridge method to register this implementation and make it available in the runtime.
Griver.registerBridge(new GriverBridgeManifest(TestBridgeExtension.class, Arrays.asList("testAPI")));If the class resides in a different module that you can not refer to directly, you can also use the following way to register:
Griver.registerBridge(new GriverBridgeManifest("com.alibaba.griver.playground.bridge.TestBridgeExtension",// class name
                                                        Arrays.asList("test"))); //JSAPI action list
Technically you have multiple JSAPI implementations in one single class file and the mechanism in the Mini Program SDK supports such arrangement. However, we recommend you separate JSAPI implementations in respective class files for code readability and maintenance.
Register the new JSAPI in Mini Program Platform
Step 1 - Register a new JSAPI
Open the Mini Program Platform and log in with the admin account. Select JSAPIs from the left navigation panel, and click the New API button to start registering a new JSAPI.
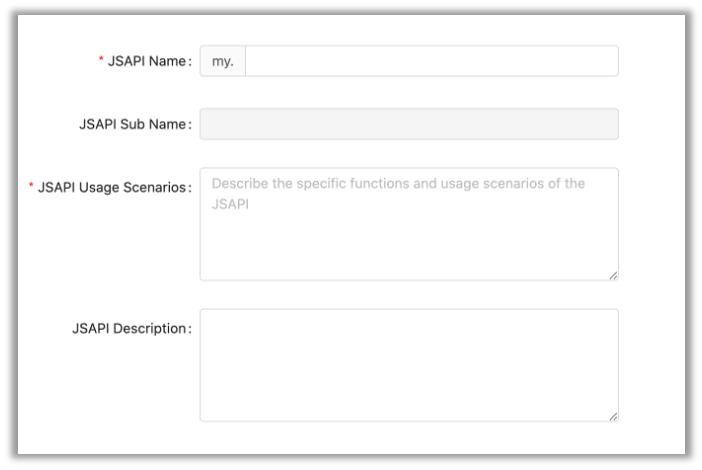
The two mandatory fields are the JSAPI name and usage scenario. Use the correct name (i.e., testAPI in this example), and provide a brief explanation of this API usage.
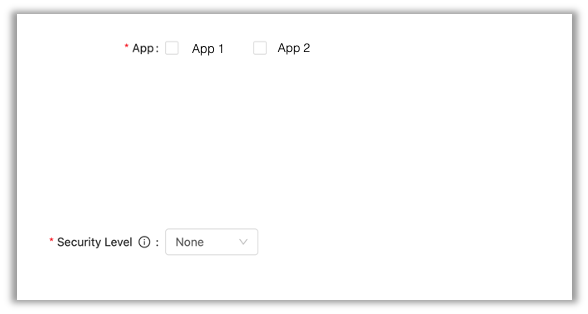
Select an available app(s) you want for this JSAPI, then specify the security level.
- None: cannot access network, local file, or user info
- Low: can access network, yet cannot access local file and user info
- Medium: can access network and local file, but cannot access user info
- High: can access network, local file, and user info
The input parameter, output parameter, error code, and sample code fields are all optional.
Step 2 - Add a new feature
A feature is basically a set of JSAPIs grouped by business functionality. For instance, you can have a feature called 'payment' for all payment-related JSAPIs.
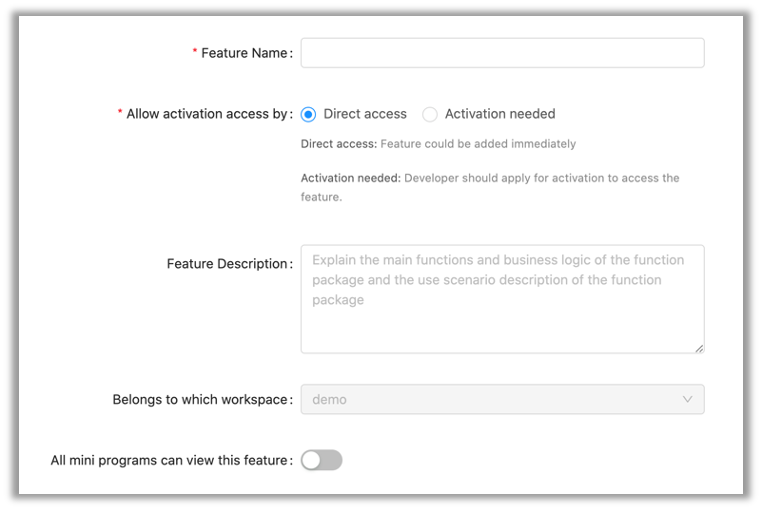
Pick 'Direct access' if you want the developers to use this feature straightaway without explicitly requesting permission, and alternatively set it to 'Activation needed', which requires the developer to raise requests specifically for this feature in order to use it in the mini program.
You can also set the visibility of the feature by toggling the 'All mini programs can view this feature' flag, then set it to true to allow all mini programs, internal or external, to use this feature, or false to limit its usage to internal mini programs only.
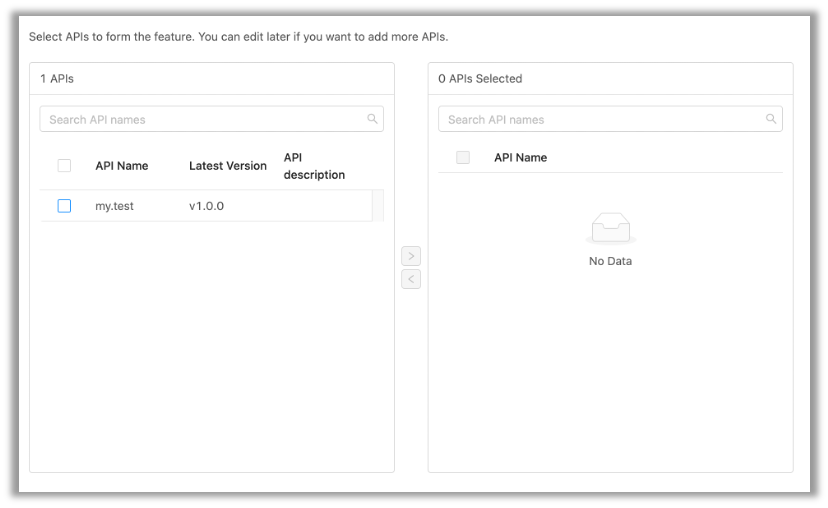
Select the JSAPIs from the left panel, and move them to the right panel to include them in the newly created Feature.
Use the newly created JSAPI in mini program
Go to the mini program management page and click on the 'Features' tag, then add the features you need in your mini program.
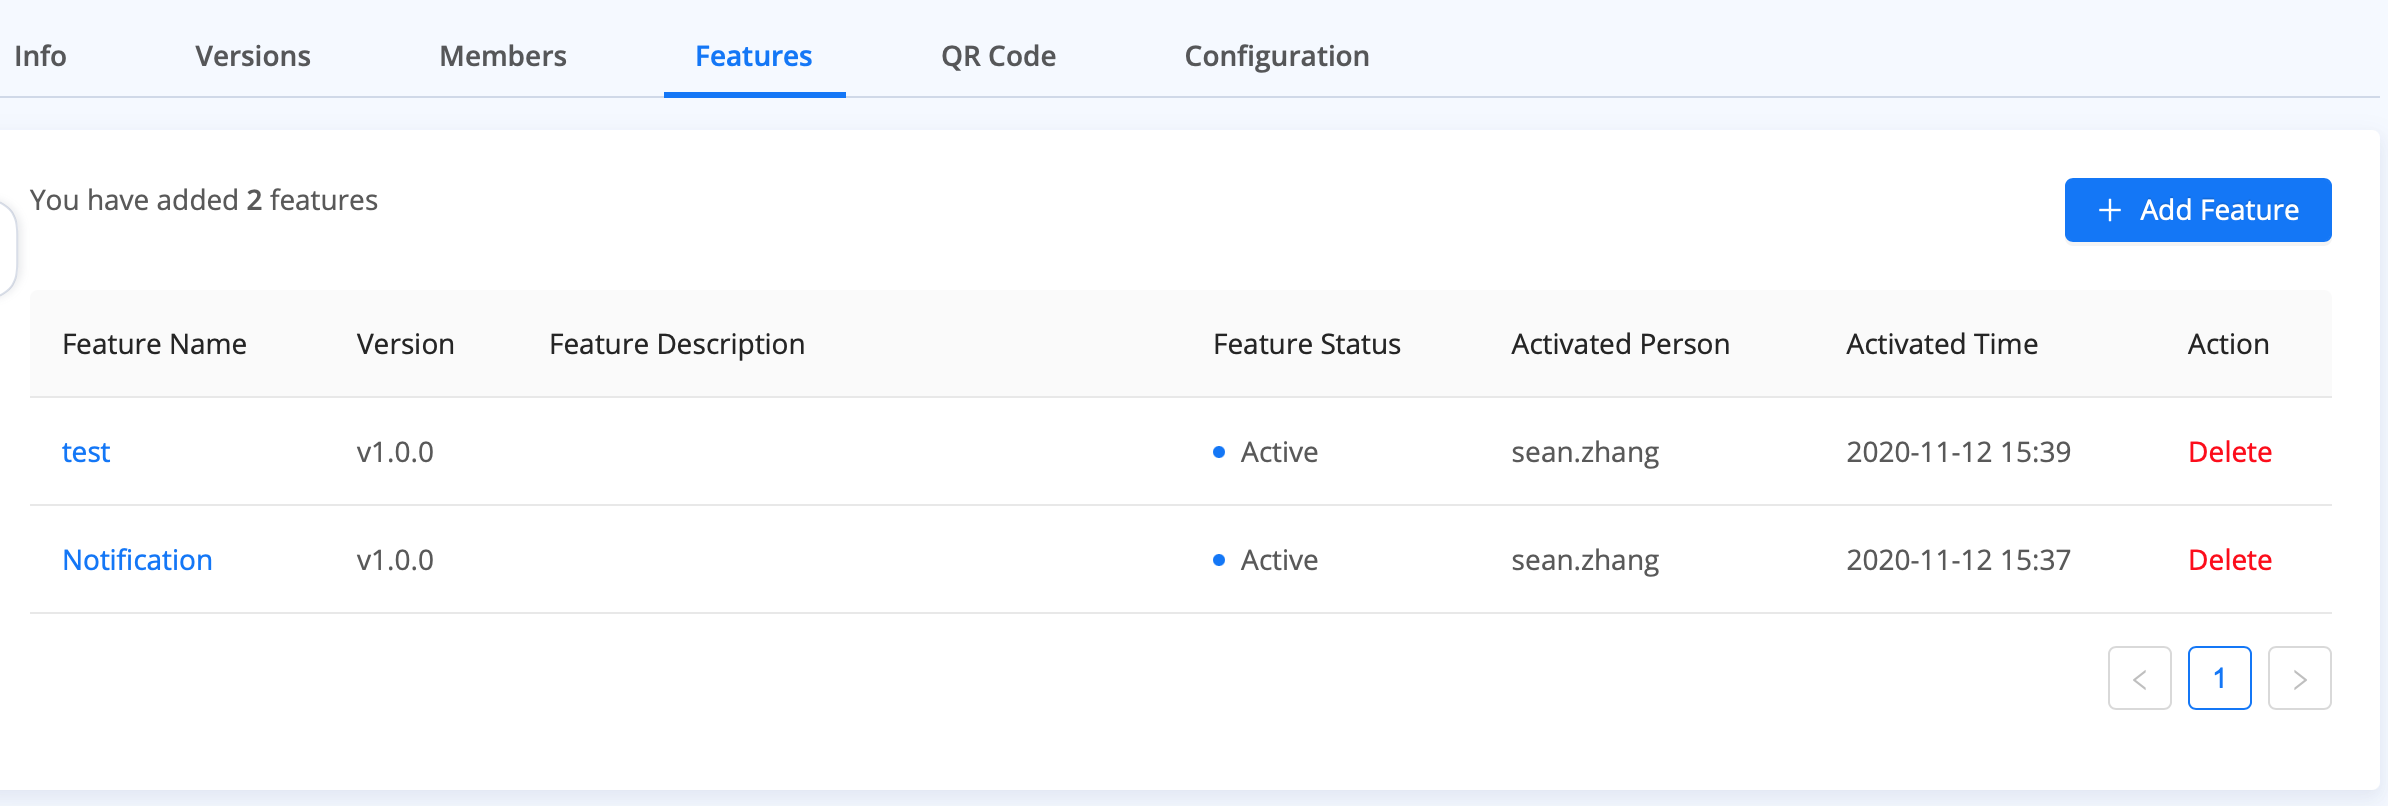
After adding the features, start using my.call('XXX') statement (where XXX is the name of the JSAPI) to invoke the custom JSAPI in the mini program.
