Integration guide
This article provides guidance on how to integrate EasySafePay to enable password-free payment for your buyers. By integrating EasySafePay, you will no longer need to manually obtain buyer authorization, refresh payment tokens on a regular basis, or handle redirections between different clients.
Deployment
EasySafePay provides two payment flows, however, the integration process for both remains the same.
Payment flows
The two payment flows offered by EasySafePay are differentiated by whether the buyer is redirected to the payment method side:
- Seamless experience
- Redirection experience
Seamless payment experience
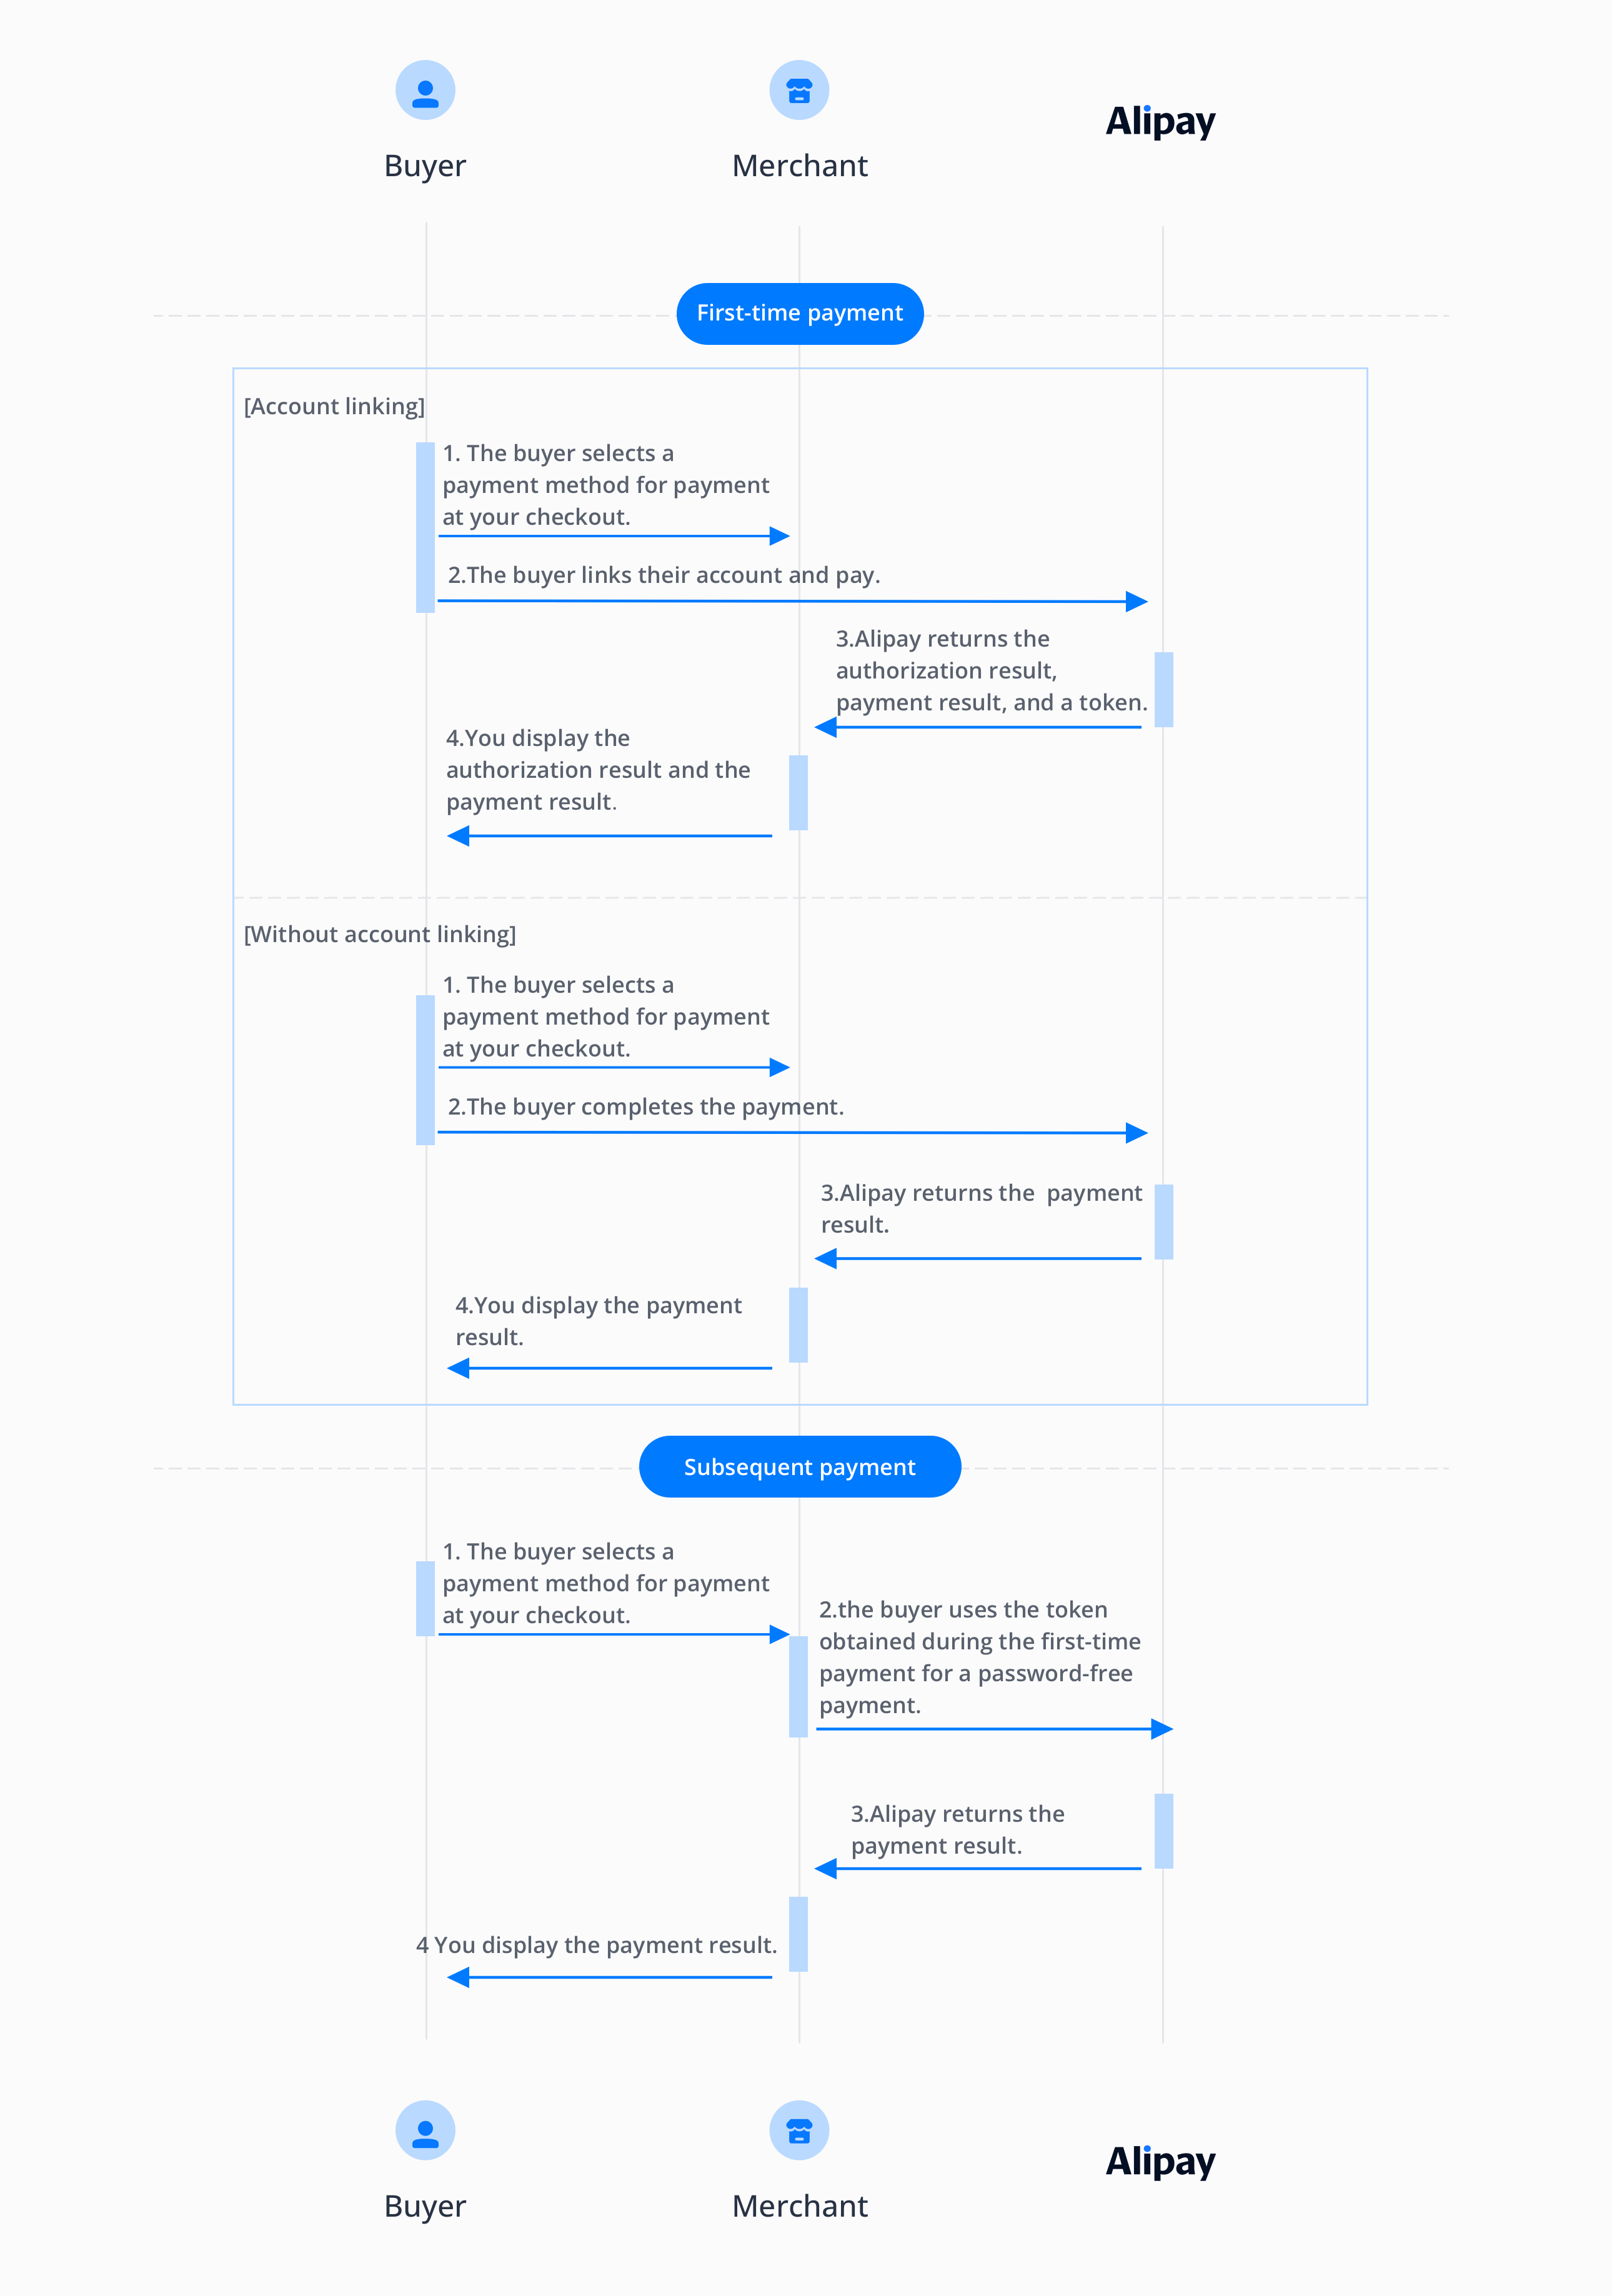
The seamless payment experience frees buyers from redirection to the payment method client. The following graphic shows the seamless payment experience for the first-time payment and future payments.

Figure 1. Payment process for a seamless experience
Note: For seamless payments on computer websites, the first-time payment without account linking is not supported.
Redirection payment experience
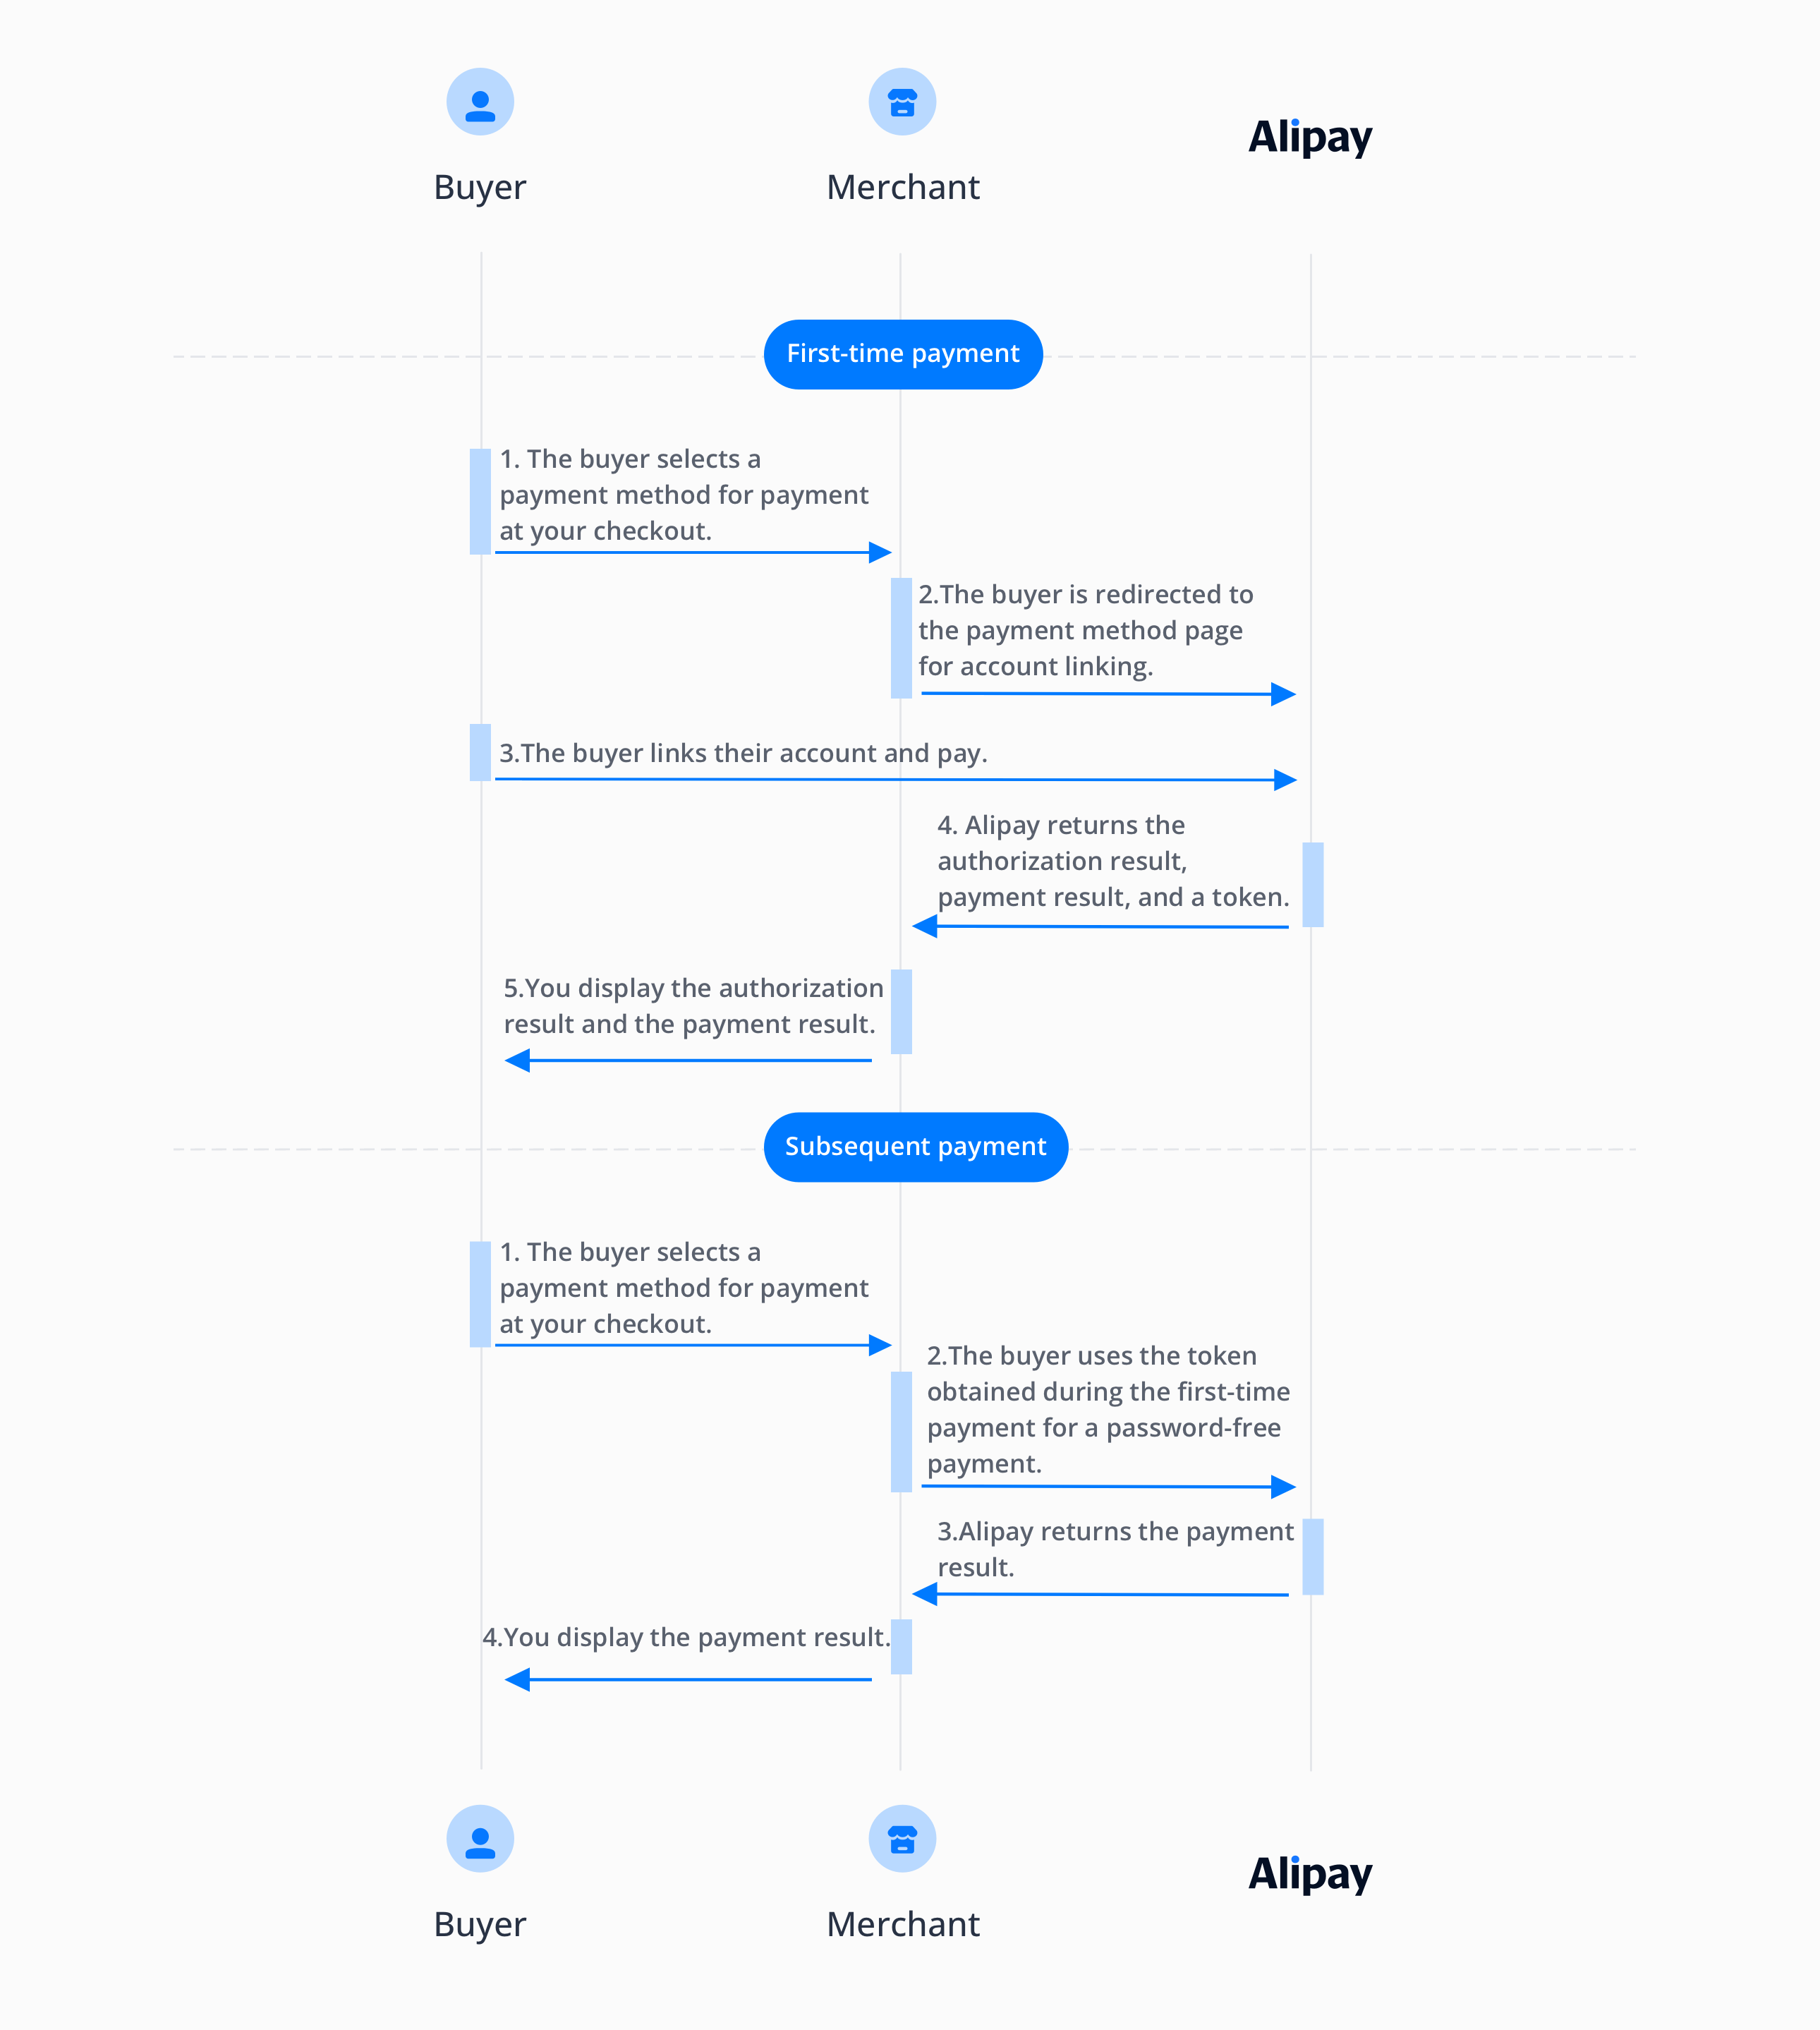
The redirection payment experience requires buyers to be redirected to the payment method client for the first-time payment. The following graphic shows the redirection payment experience for the first-time payment and future payments.

Figure 2. Payment process for a redirection experience
Prerequisites
Before integrating the SDK, familiarize yourself with the Integration guide and API Overview. This will enable you to understand the steps for integrating server APIs and notes for calling the APIs. Also, ensure that you have completed the following tasks:
- Obtain a client ID in Antom Dashboard.
- Properly configure keys in Antom Dashboard.
- Configure a URL for receiving an asynchronous notification of an authorization result and a revoked authorization result. For details, see Notifications.
Implementation steps
When implementing an EasySafePay integration, two parties are involved:
- Server-side: Your sever sends a single API call that creates payment sessions, and obtain the authorization result and payment result.
- Client-side: The EasySafePay component uses payment session data to manage actions such as obtaining payment account authorization and handling redirections.
Follow these steps to complete the integration:
- Create an SDK instance:
After your client creates the payment method page and implements the monitoring of the payment button click event, run theAMSEasyPaymethod to create the SDK instance. - Call the createPaymentSession API:
After a buyer selects a payment method for payment, your server uses the buyer's order information to send a createPaymentSession request to the Alipay server. For future payments, when calling this API, you must specify the paymentMethod.paymentMethodId parameter with the token obtained from notifyAuthorization during the first-time payment. - Call the SDK:
Run thecreateComponentmethod by using the response parameter paymentSessionData of the createPaymentSession API to call the SDK. - The buyer links their account and makes the payment:
The buyer confirms to authorize on the authorization page and links the payment method after passing the identity verification. - (Only when the buyer agrees to the authorization during the first-time payment) Obtain and display the authorization result:
You server obtains the authorization result and the token used for future payments via notifyAuthorization. You must display the authorization result along with the payment result on your payment result page. - Obtain and display the payment result:
Your server obtains the payment result by receiving asynchronous notifications via notifyPayment or calling the inquiryPayment API. You must display the payment result on your payment result page.
For more detailed information about EasySafePay integration on Web/WAP, Android, or iOS clients, learn the following topics:
