Add new JSAPI via extension
Background
The Alipay+ Mini Program SDK provides a number of built-in JSAPIs that developers can use right away. For example, there is a my.request() for mini program to make network requests to an API endpoint, my.setStorage() and my.getStorage() for data persistency, and a my.getLocation() to return the current device location. While these JSAPIs are sufficient for most of the scenarios, there are still cases where custom JSAPIs are needed.
The Alipay+ Mini Program SDK is extensible and it allows you to add new functionalities on top of it. You can simply add an Extension to your Android and iOS app, register it in the Mini Program Platform, and assign a permission scope. Then this new JSAPI will be ready for your mini program developers to use.
This document helps integrators to customize their own JSAPI or replace the default JSAPI implementation from Griver AppContainer.
Create new JSAPI
Implement JSAPI
Step 1 - Add a new class
To add or override a JSAPI, create a new class that extends RVKJsApiHandler.
TestJsApiHandler.h
#import <AriverKernel/AriverKernel.h>

NS_ASSUME_NONNULL_BEGIN

@interface TestJsApiHandler : RVKJsApiHandler

@end

NS_ASSUME_NONNULL_END
Step 2 - Override the implementation method
In the implementation file, override the -handler:context:callback: method and provide business logic to handle the JSAPI call.
TestJsApiHandler.m
#import "TestJsApiHandler.h"

@implementation TestJsApiHandler

- (void)handler:(NSDictionary *)data context:(RVKContext *)context callback:(RVKJsApiResponseCallbackBlock)callback {
    // process the input data
    // apply business logic
    NSMutableDictionary *result = [@{} mutableCopy];
    [result setValue:@"value1" forKey:@"result1"];
    [result setValue:@"value2" forKey:@"result2"];

    callback(result);
}

@end
See the following table for more details:
Parameter | Type | Description | Value |
data | NSDictionary | The parameters user passed to JSAPI. Note that only the following primitive types are allowed.
| |
context | RVKContext | The mini program context | You can get information about the currently running mini program from the context, for example, the mini program running controller instance. |
callback | RVKJsApiResponseCallbackBlock | The callback method | you can use this callback to return a response to the calling mini program. |
Step 3 - Setup JSAPI plist file
For Griver to be aware of new JSAPIs, you need to add a plist file that records the information of JSAPI classes. Create a plist file in the project to set up these values. Here we use MyExtraPlugins.plist as the file name.
In the plist file, add the content below inside the plist tag. Note that in the JsApis array, you may add more than one JSAPIs. In this array, every JSAPI is represented by a dict, in which name is the name of the implemented class and jsApi is the name of the register JSAPI.
<dict>
  <key>JsApiRuntime</key>
  <dict>
    <key>JsApis</key>
    <array>
      <dict>
        <key>name</key>
        <string>TestJsApiHandler</string>
        <key>jsApi</key>
        <string>testAPI</string>
      </dict>
        </array>
    </dict>
</dict>
Unlike Android where you can create multiple customized JSAPIs in one class, in iOS you need to create separate classes for each customized JSAPI.
Very important issue for Swift
For Swift classes (pure Swift class or inheriting NSObject), the actual class name is PRODUCT_MODULE_NAME.fooBar, where PRODUCT_MODULE_NAME is the same as your target build setting. So, for example, if TestJsApiHandler is written in Swift from the GriverDemo project, then in the plist below, the value for name key should be GriverDemo.TestJsApiHandler.
Register JSAPI to Griver
Register the plist file in Griver configuration during initialization.
GRVConfiguration *grvConfig = [[GRVConfiguration alloc] init];
grvConfig.plistFilePathForExtraPlugins = @"PATH_TO_YOUR_PLIST";
Then you can continue with the next step to register the new JSAPI in the Mini Program Platform and open mini programs to use.
Register the new JSAPI in Mini Program Platform
Step 1 - Register a new JSAPI
Open the Mini Program Platform and log in with the admin account. Select JSAPIs from the left navigation panel, and click the New API button to start registering a new JSAPI.
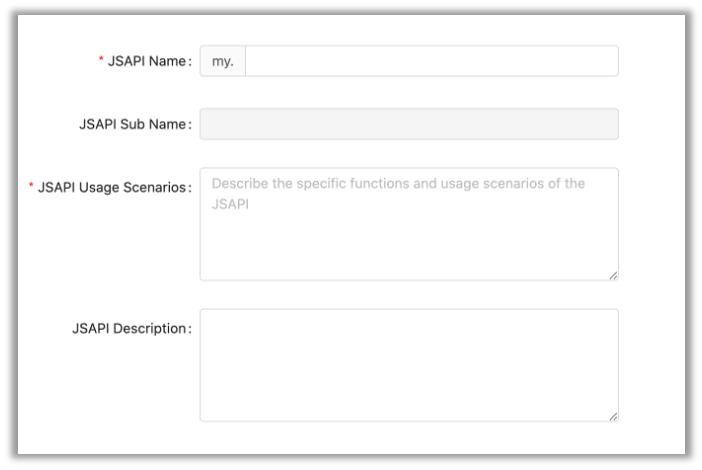
The two mandatory fields are the JSAPI name and usage scenario. Use the correct name (i.e., testAPI in this example), and provide a brief explanation of this API usage.
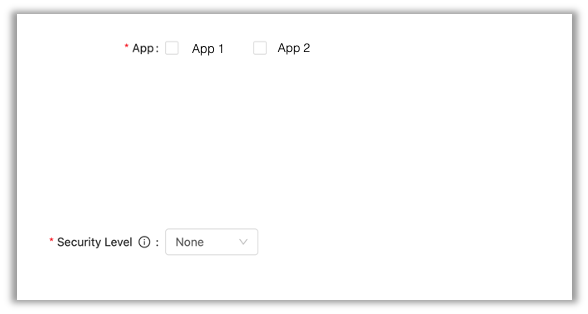
Select the app(s) that you want this JSAPI to be available to, and specify the security level.
- None: without access to network, local file, or user info
- Low: access network, without access to local file and user info
- Medium: access network and local file, without access to user info
- High: access network, local file, and user info
The input parameter, output parameter, error code, and sample code fields are all optional.
Step 2 - Add a new feature
A feature is basically a set of JSAPIs grouped by business functionality. For instance, we can have a feature called 'payment' for all payment-related JSAPIs.
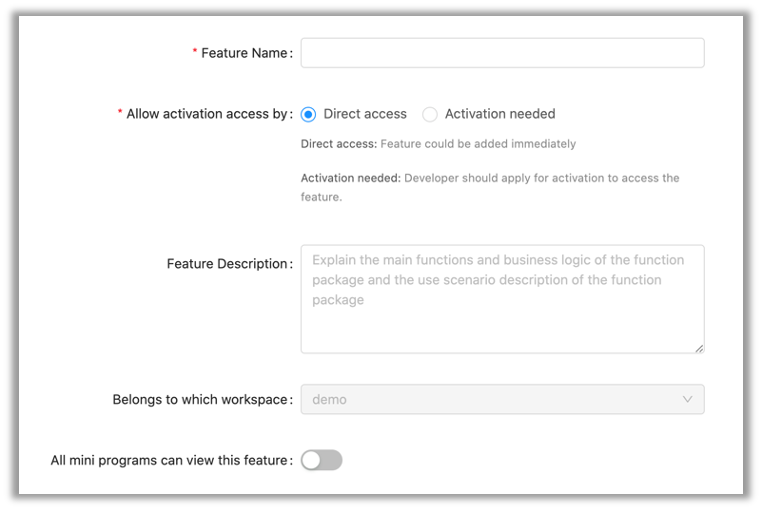
Pick 'Direct access' if you want the developers to use this feature straightaway without explicitly requesting permission, and alternatively set it to 'Activation needed', which requires the developer to raise requests specifically for this feature in order to use it in the mini program.
You can also set the visibility of the feature by toggling the 'All mini programs can view this feature' flag. Then setting it to true allows all mini programs, internal or external, to use this feature, or false to limit its usage to internal mini programs only.
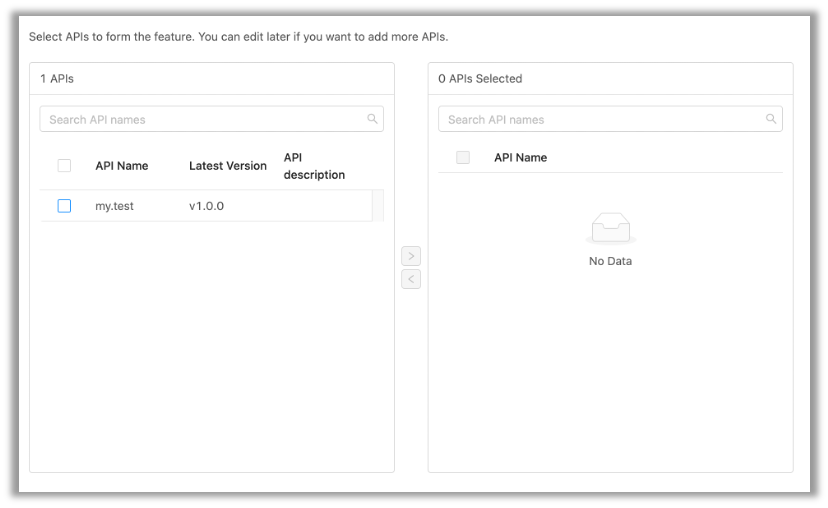
Select the JSAPIs from the left panel, and move them to the right panel to include them in the newly created Feature.
Use the newly created JSAPI in mini program
Go to the mini program management page and click on the 'Features' tag, then add the features that you need in your mini program.
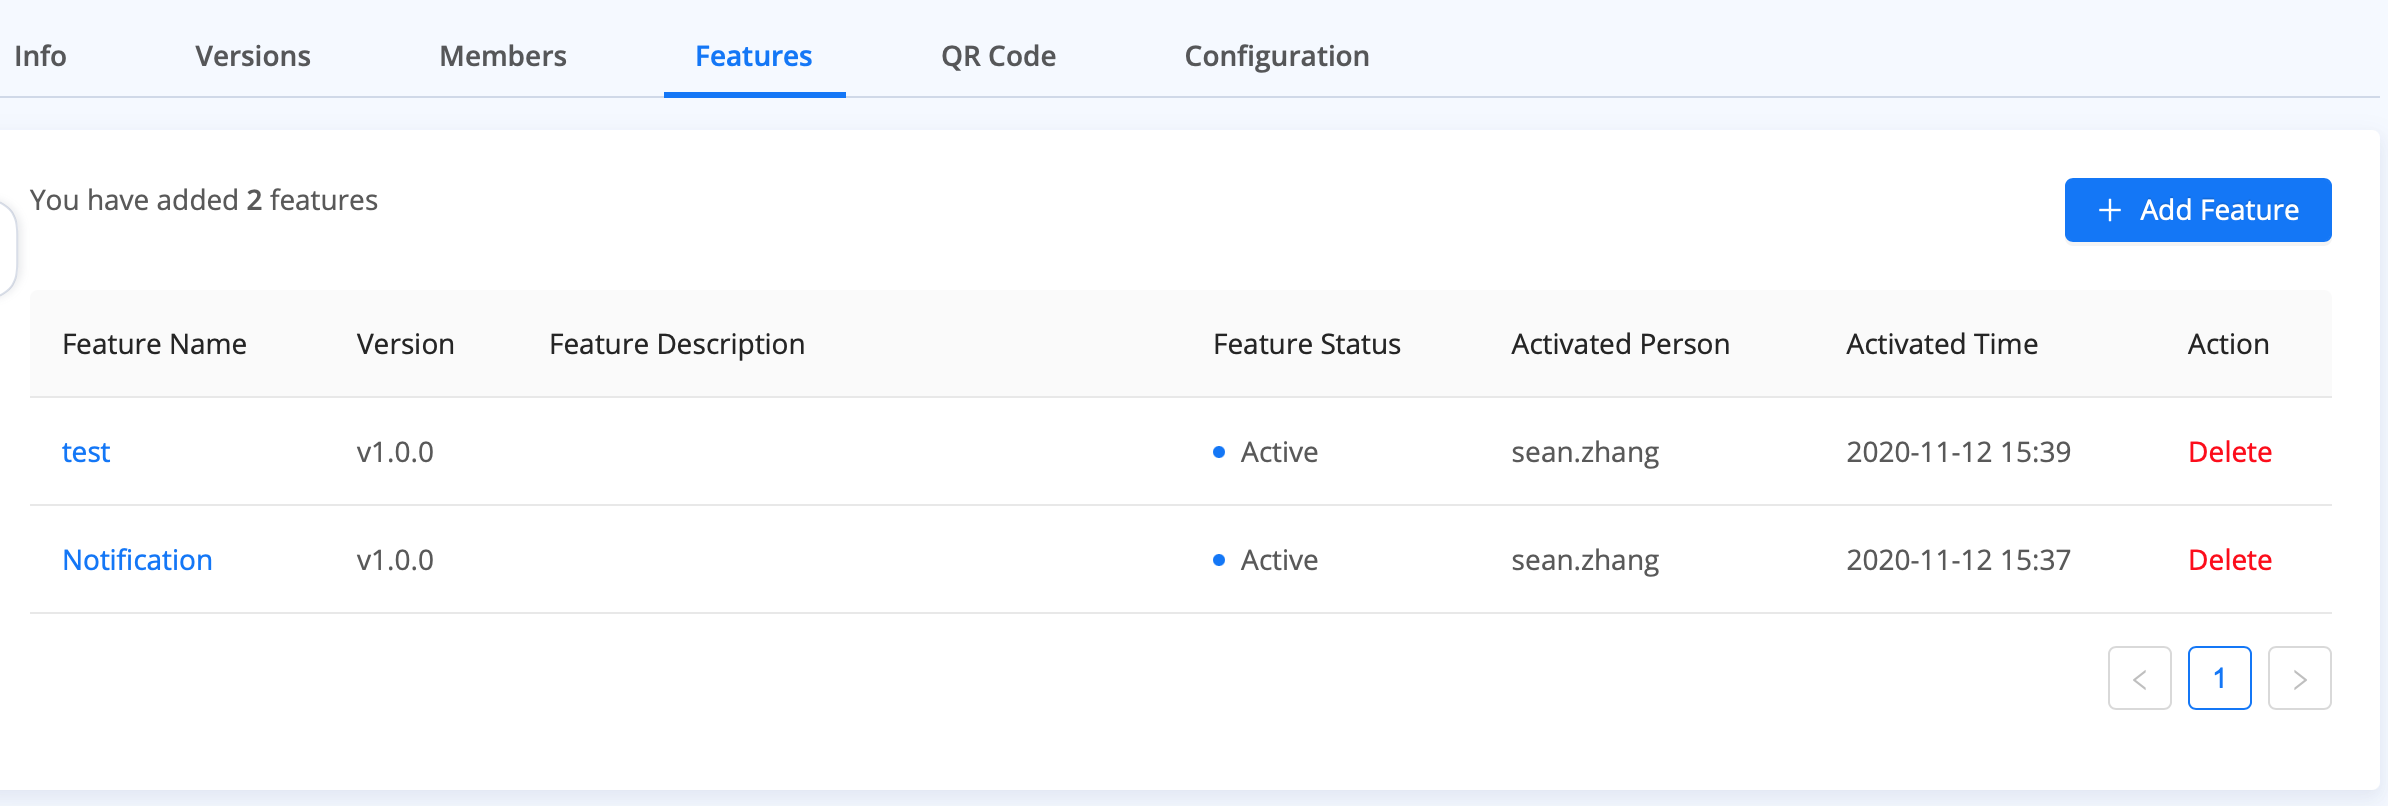
After adding the features, you can start using my.call('XXX') statement (where XXX is the name of the JSAPI) to invoke the custom JSAPI in the mini program.
